User Manual
Table of Contents
2.2.1 Smart Phone APP Installation 5
2.3 ReceiptCanada Dashboard 12
2.3.2 Set up company profile 16
2.5 Receipts data processing & editing 22
2.5.3 Duplicate Receipt processing 23
2.5.4 Verify the receipts data. 25
2.5.5 Batch Assign Chart of account /payment 28
2.5.6 Export to T2125 Tax Form 30
2.5.7 Exporting data to Form T777 35
3.1.1 Upload the receipts image 36
3.1.2 Verify the receipts after upload 36
3.1.3 Assign the Chart of Account & Payment Mapping for Receipts 36
3.1.4 Revise & edit the receipts data 36
3.1.5 Export to T2125 or T777 Tax Form 36
Introduction
This User Guide provides the information necessary for Receipt Canada user to effectively use the APP and dashboard.
Overview
Receipt Canada app simply take pictures of your receipts, invoices, or bills. Receipt Canada app accurately extracts data and classifies to relevant accounting category and generate form T777 & T2125.
There’s no need to manually enter data or juggle receipts in bulky envelopes, Receipt Canada app can help you to upload and store your receipts, bills, and invoices automatically.
Key features include:
- Free app with free trial for self-employed.
- Real-time automatic and accurate Invoice & Receipt data extraction in seconds
- Shareable account between SE user and accountant
- Generating T2125 and T777
Getting Started
System Navigation
ReceiptCanada App
Smart Phone
T777
T2125
Dashboard
Scanner
Accountant
ReceiptCanada APP
Smart Phone APP Installation
- On your smart phone, go to “Apple Store” or “Google Play Store”, search “Receipt Canada”.
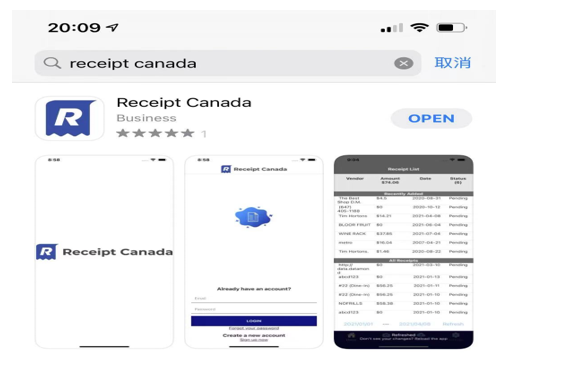
- Download and Install “Receipt Canada” App.
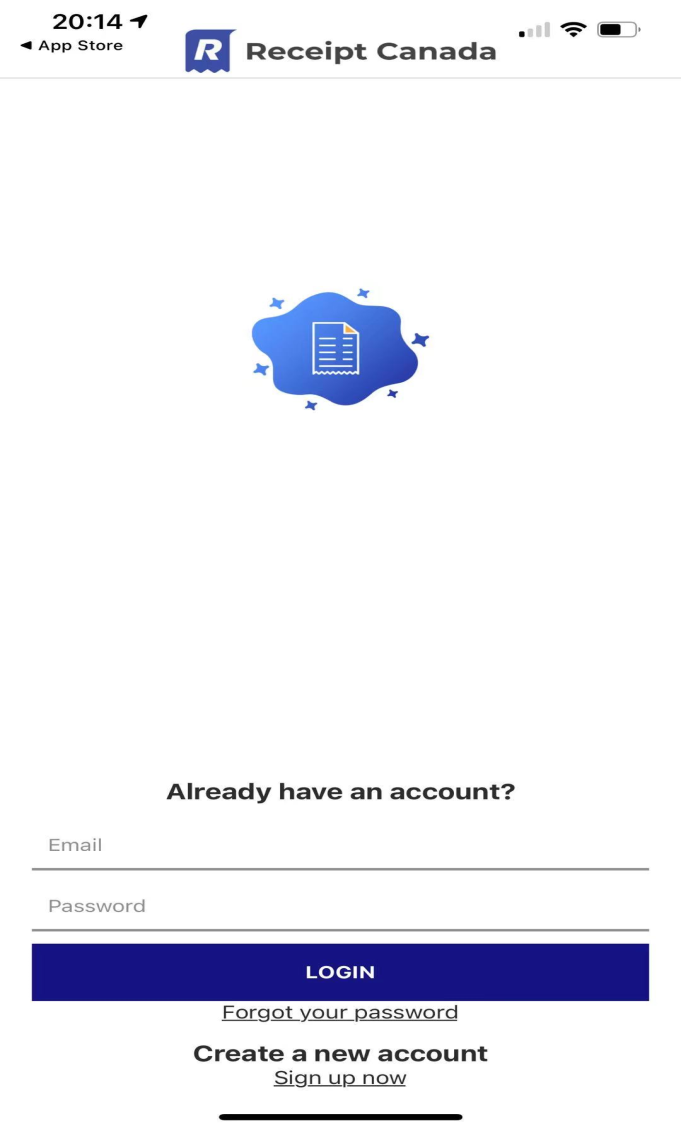
Account registration
For new users, to complete the registration in the mobile APP, please click on the App’s “Sign up now” -> “Register”, the same as the process of web account registration. Please refer to chapter 2.3.2 Account registration.
Upload receipts image
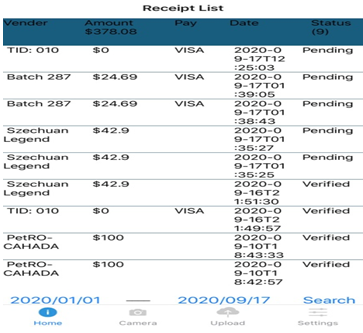
- Log in the Receipt Canada app from your smart phone.

- Tab “Camera” to take a picture then upload it.
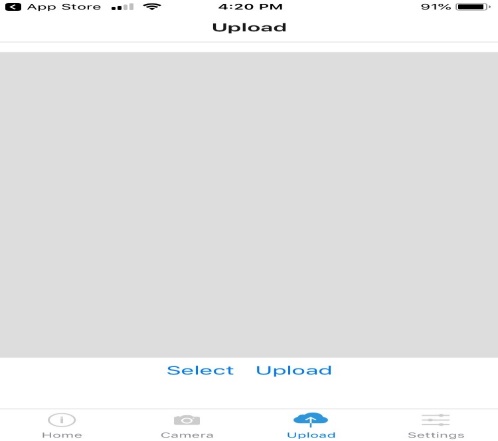
- Or Tab “Upload” to select a picture from your smartphone album. The receipt status will show “Pending” in the home page.
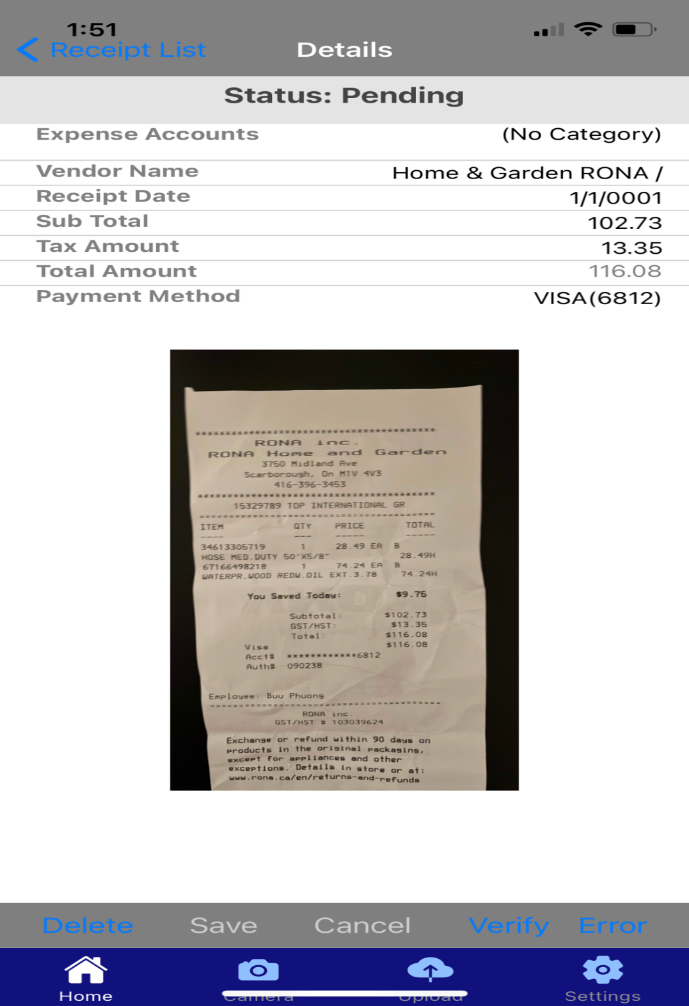
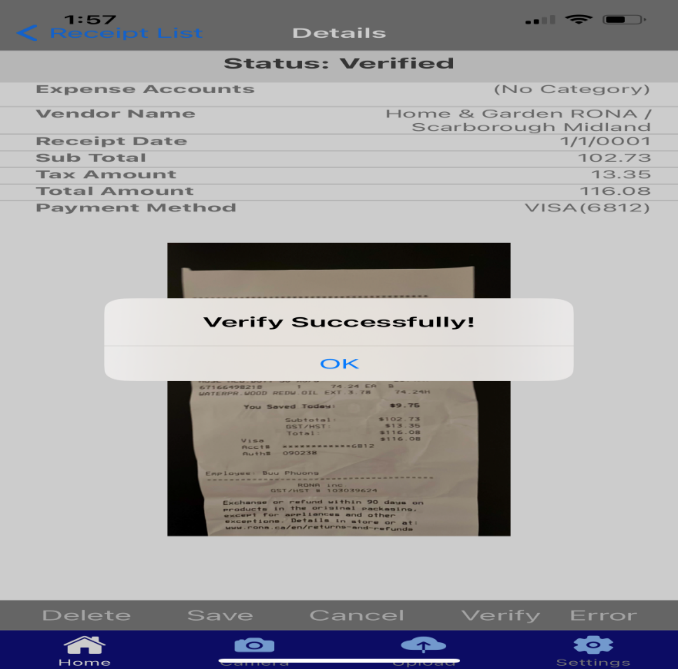
Verify receipts data
Verify the receipt amount uploaded through your phone by click the receipt. You may manually update the amount field to ensure it is accurate. Then click Save button. The receipt status will show “Verified” in the home tab.

ReceiptCanada Dashboard
Dashboard at a glance.
- When Register, Choose the correct program, ie., Self-Employed.
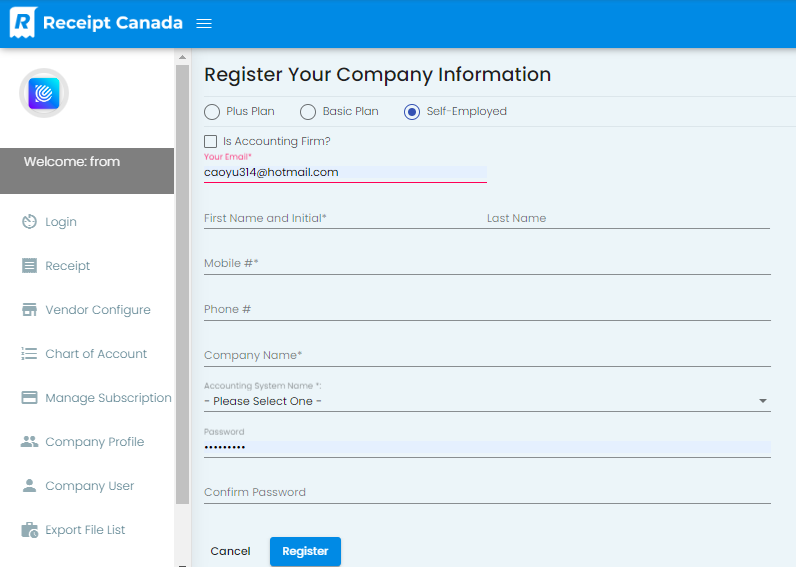
- When Register, Choose the correct Form either T2125 or T777 if you have Form T2200 signed.

Login to dashboard
- Log in the Receipt Canada dashboard, open the URL in a web browser https://receiptcanada.com
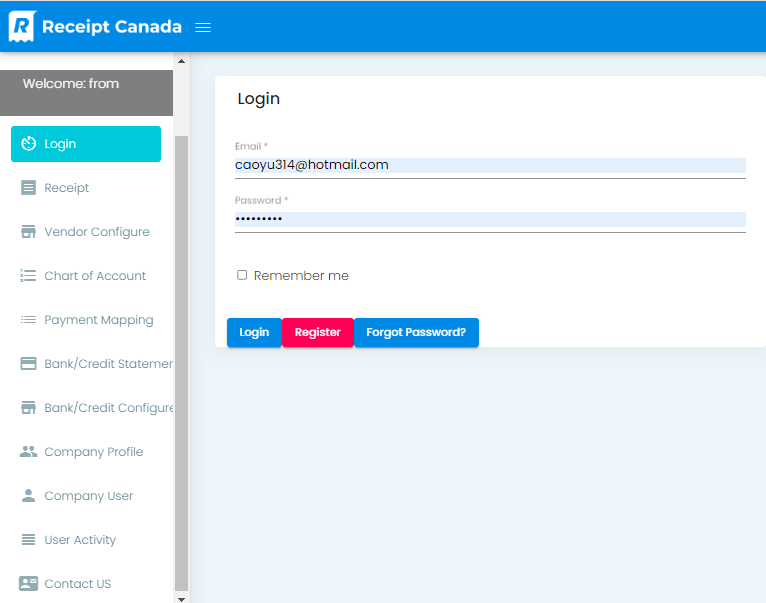
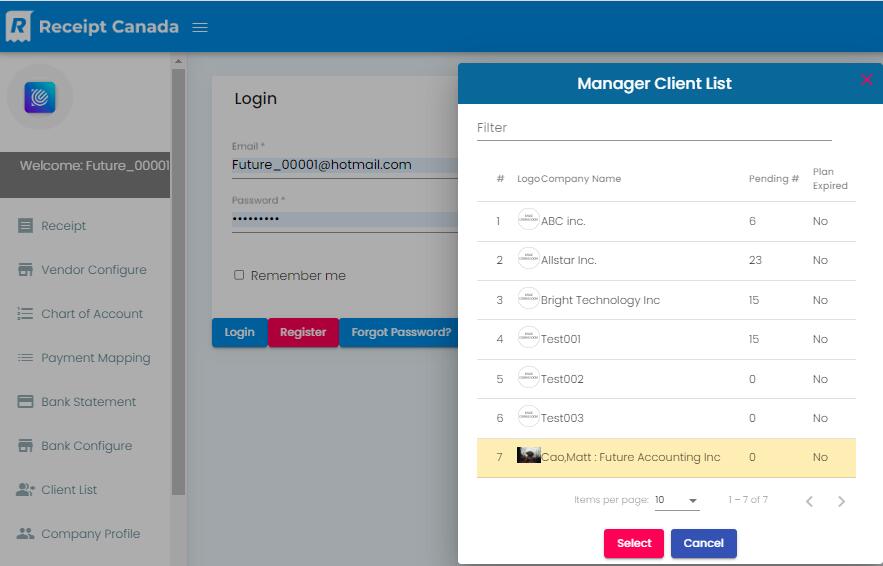
- For accounting firm login please refer to the user interface below, after login need to choose the “accounting firm” at the bottom.
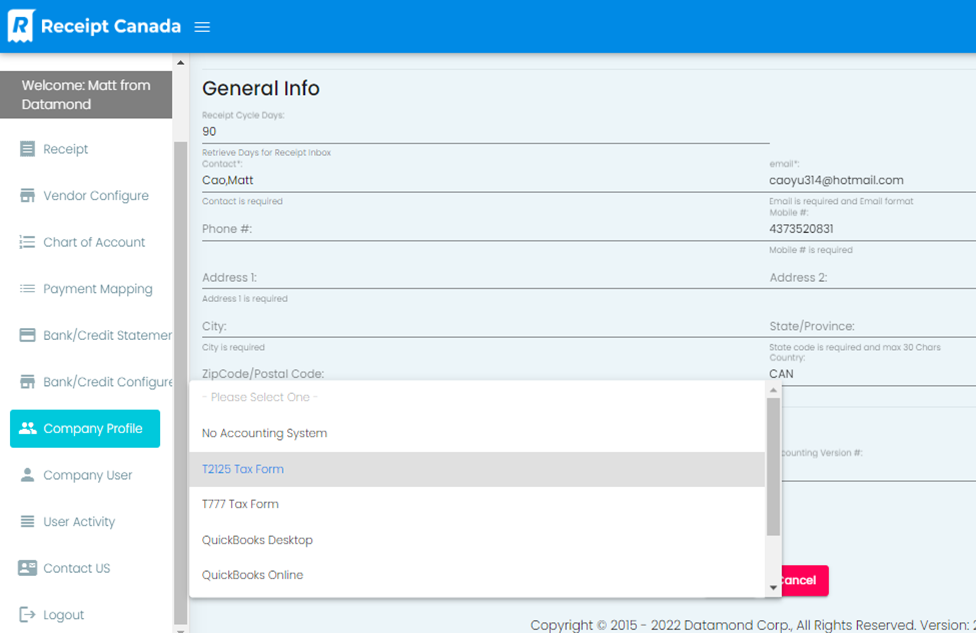
Set up company profile
Please set up the company profile in order as below showing, and choose T777 or T2125 tax form.
- Company Profile
- General Info
- Select “Accounting System Home”
- Choosing Tax Form T777 or T 2125

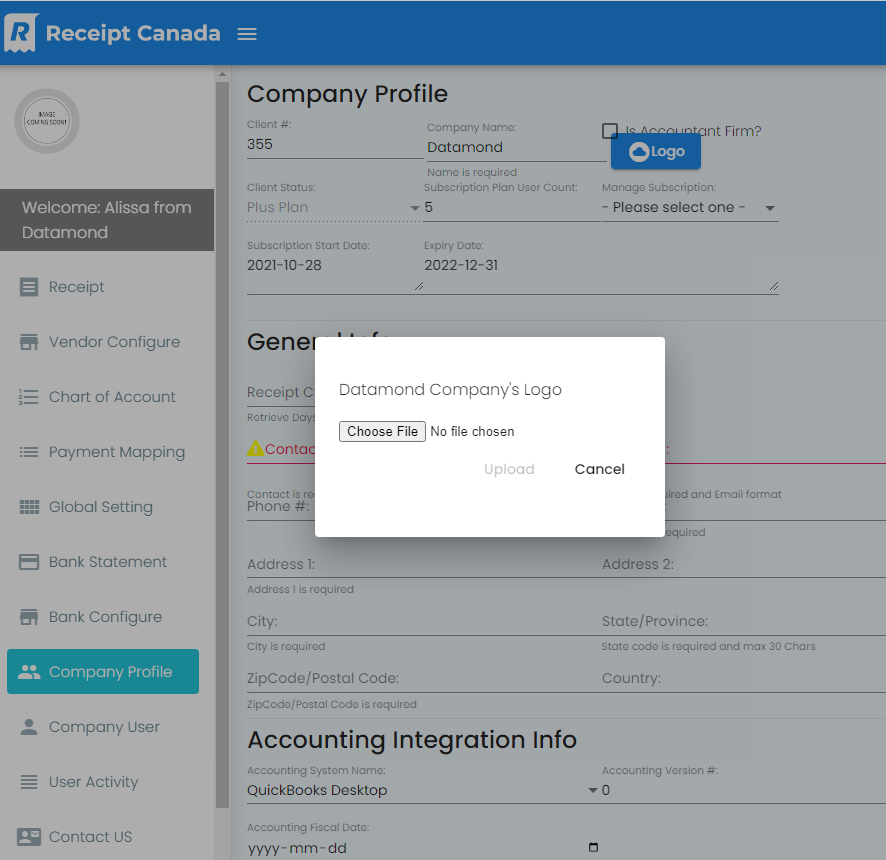
- Once uploaded your company logo, next time login, your company logo will appear in the top left corner.
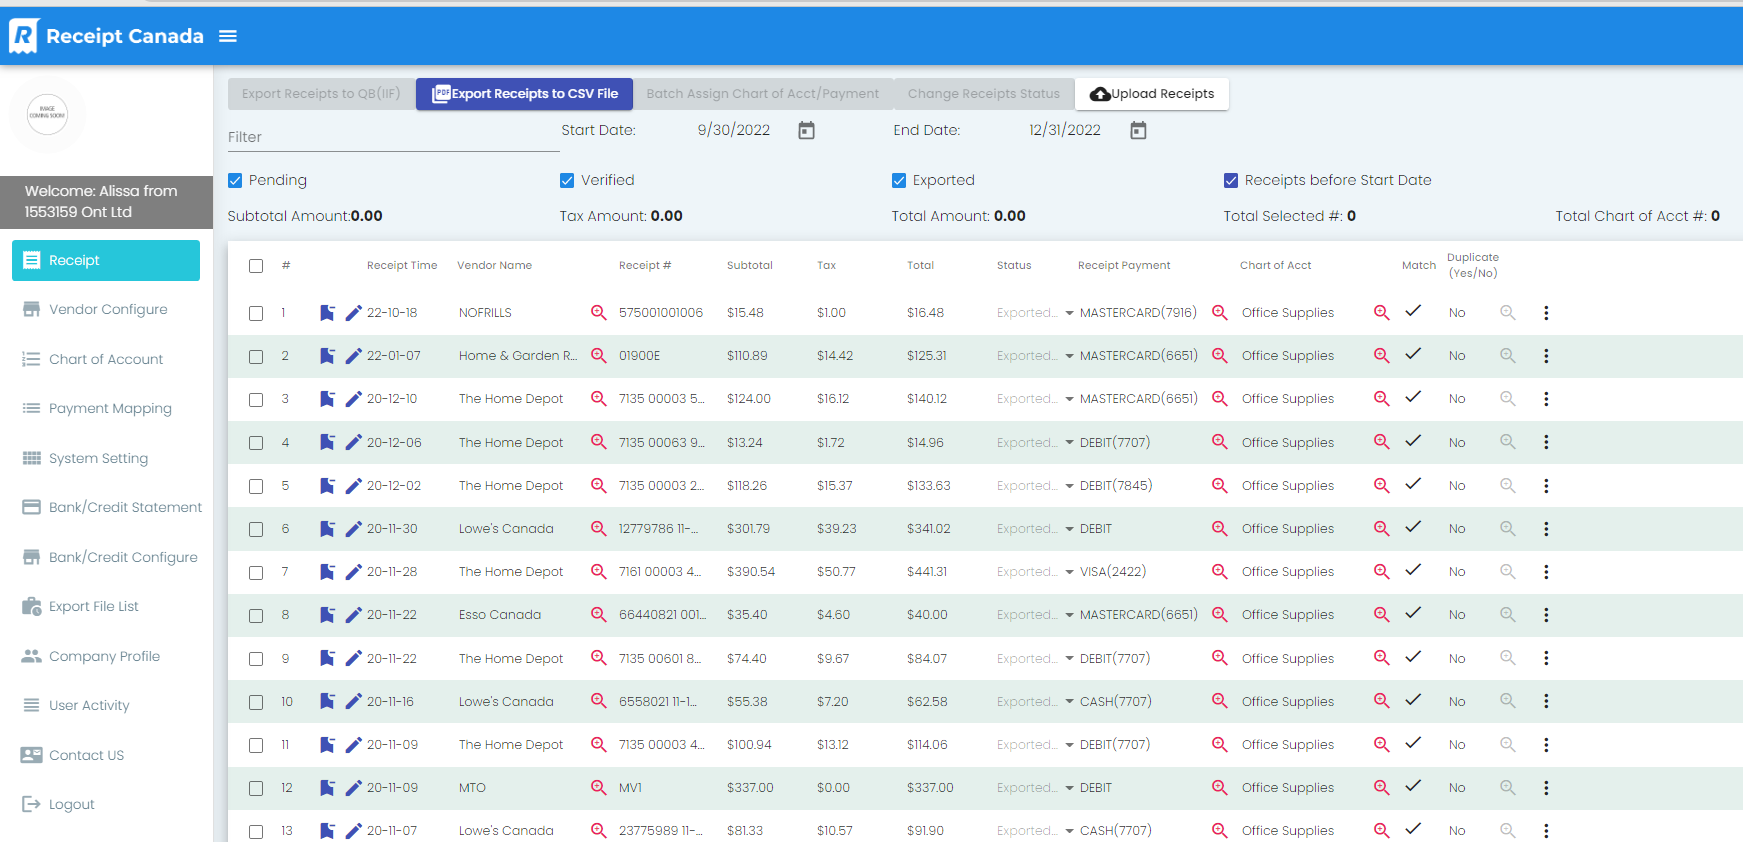
Upload receipts
- Click “Upload Receipts “
- Choose “Folder” to upload
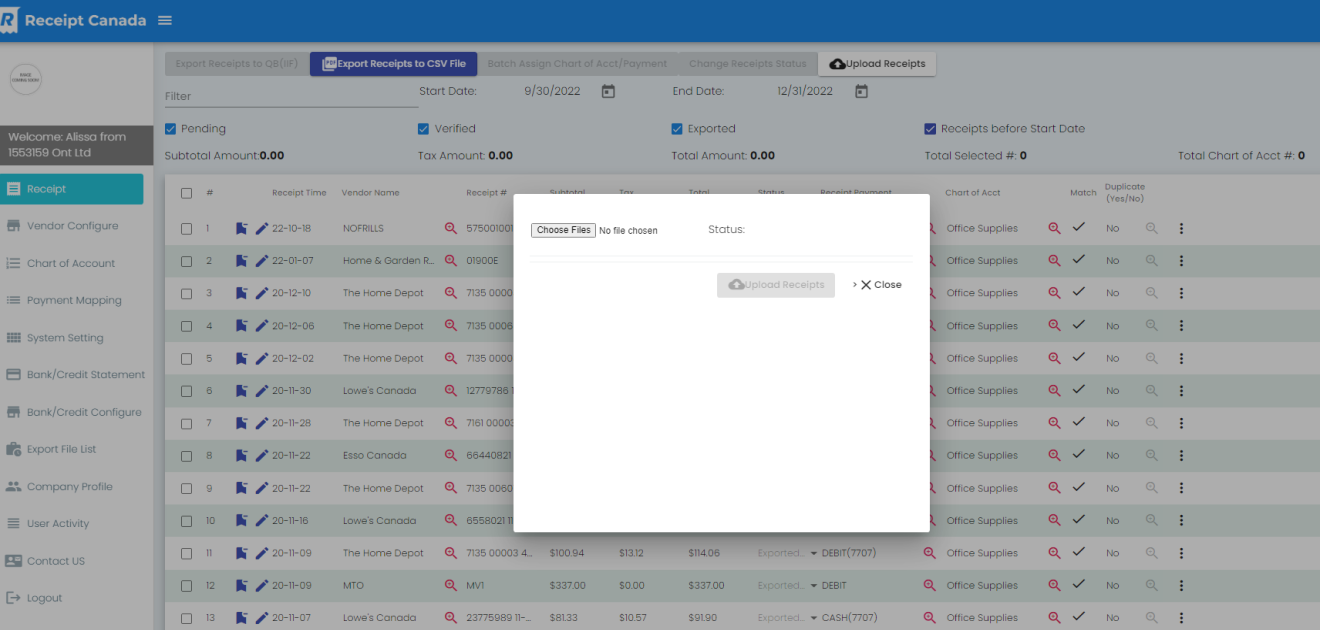

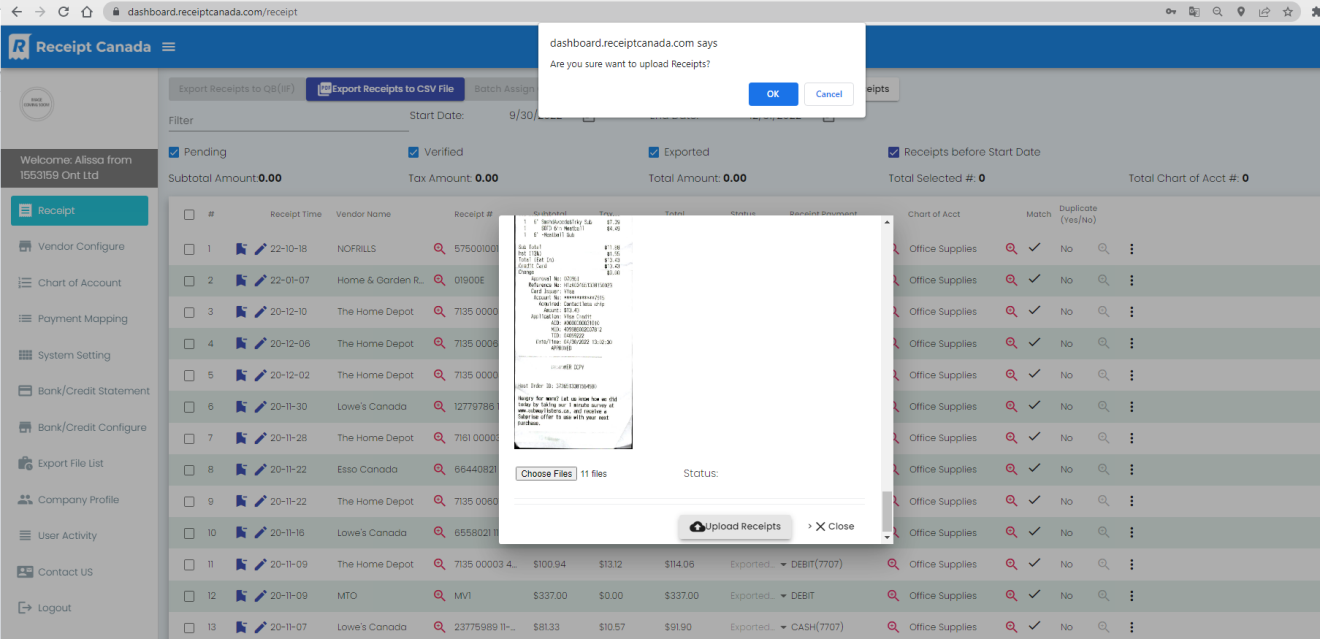
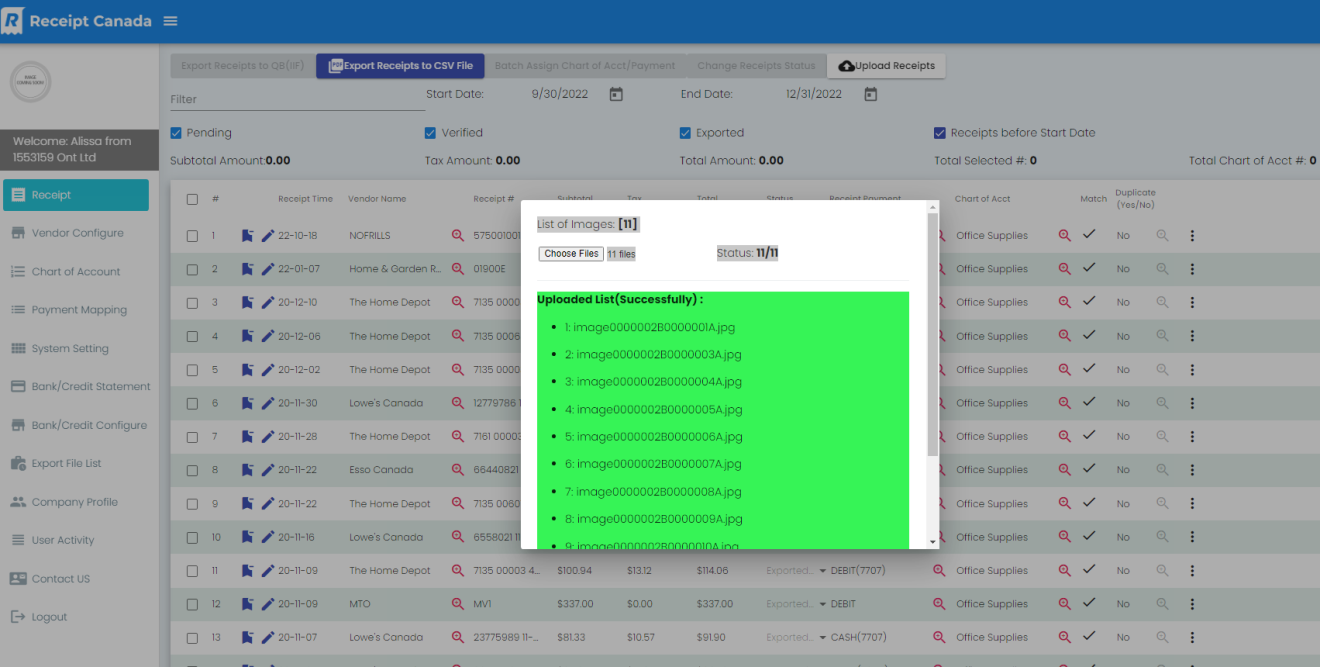
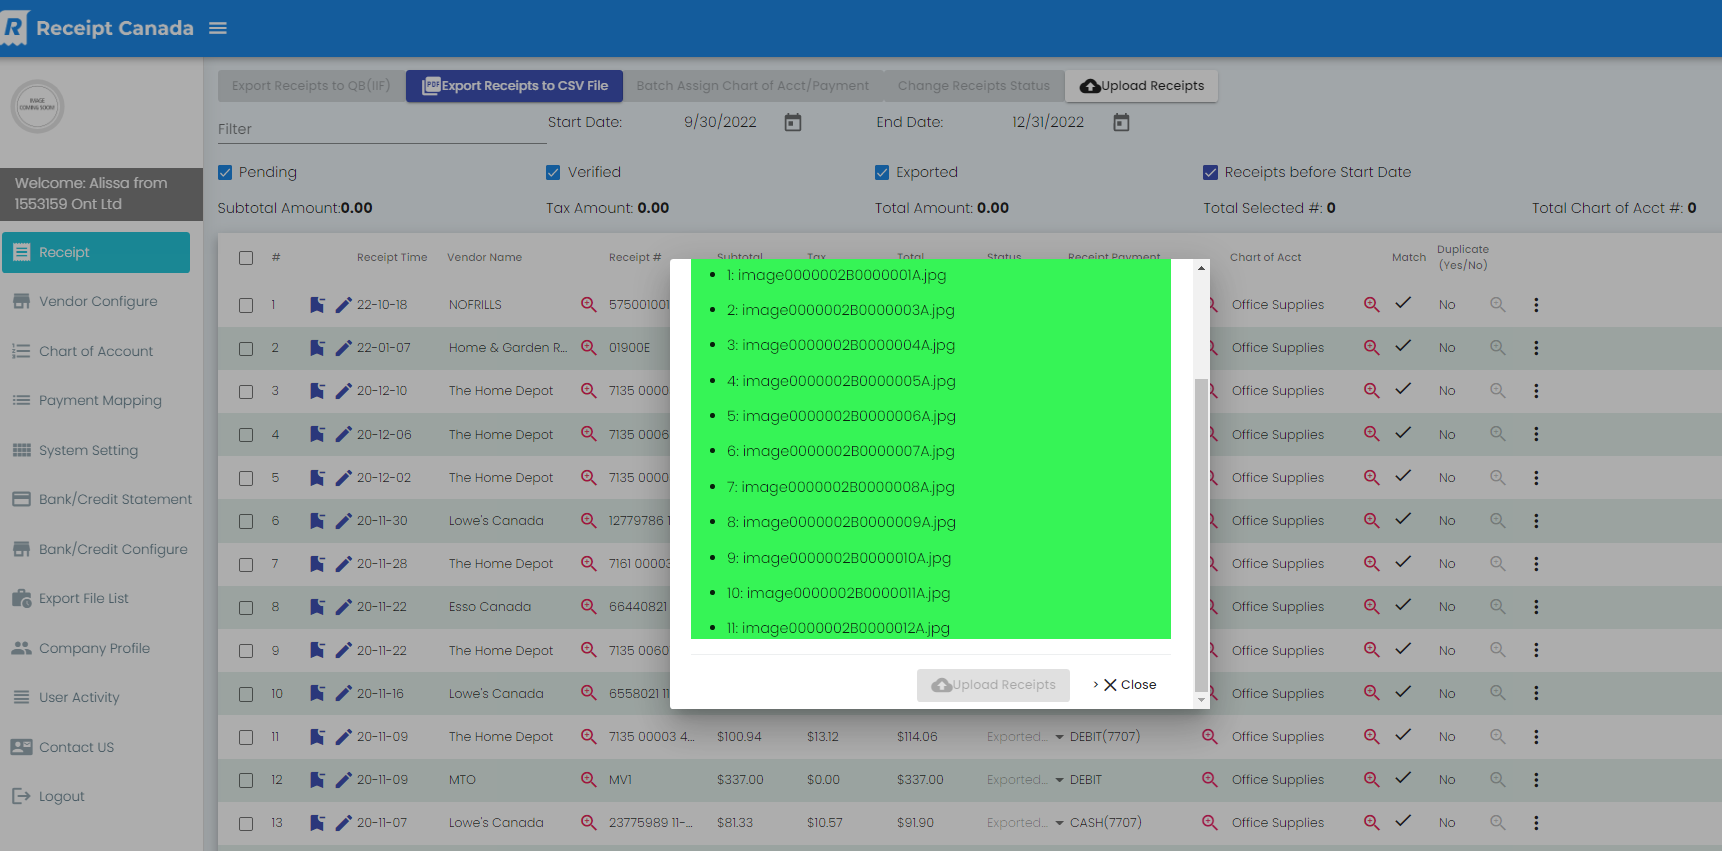
- If Receipt upload interrupted due to Wi-Fi connection or other reasons, please try to upload again.
Receipts data processing & editing
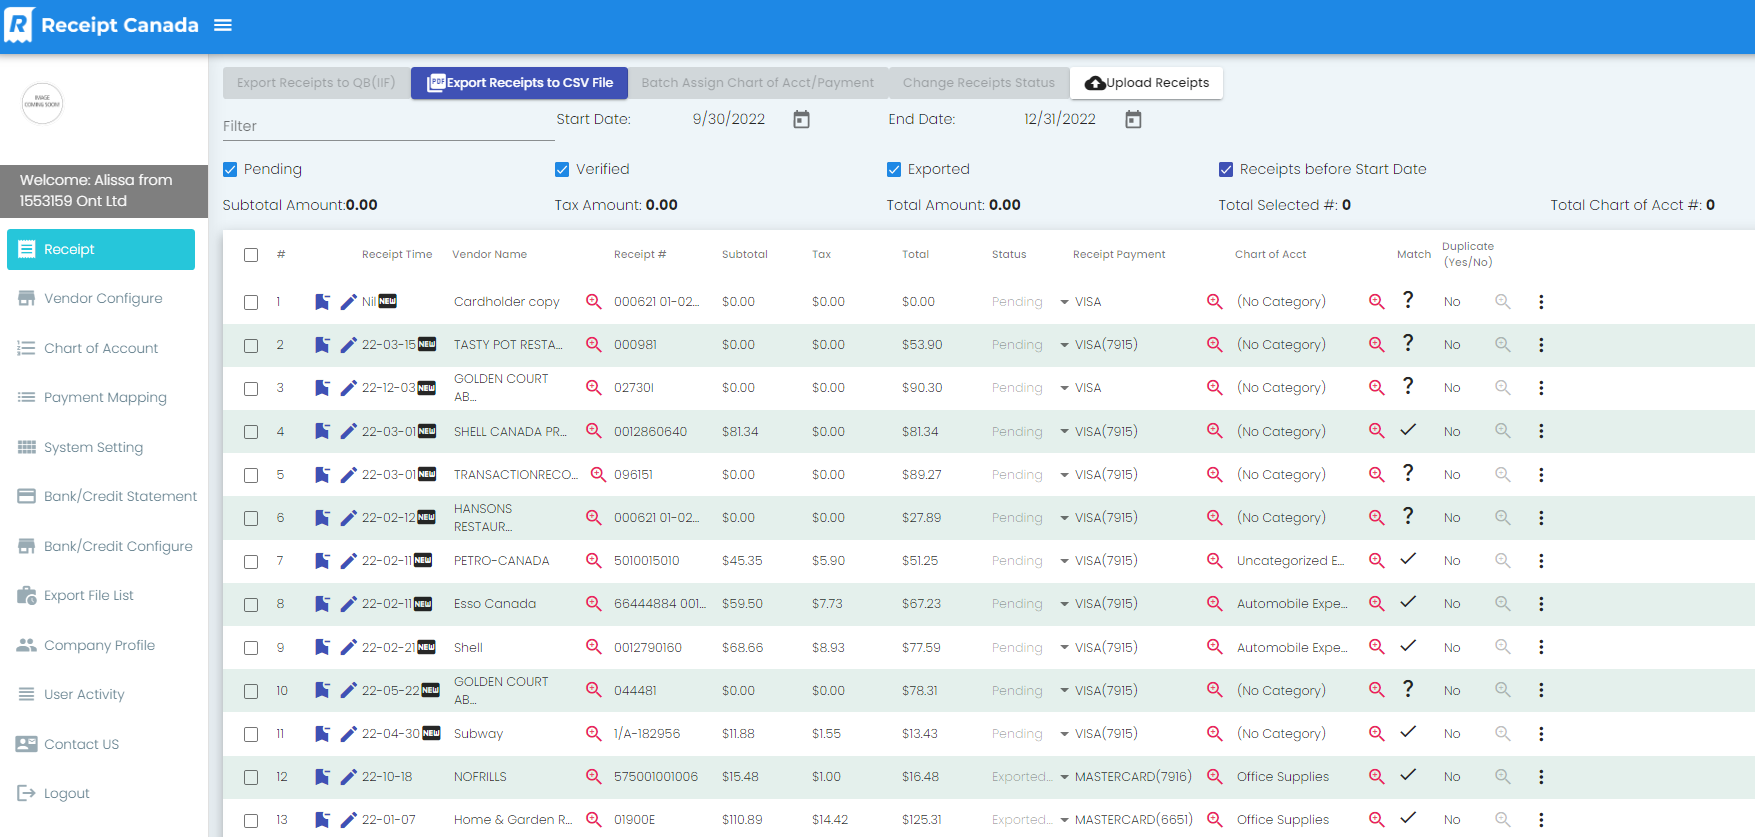
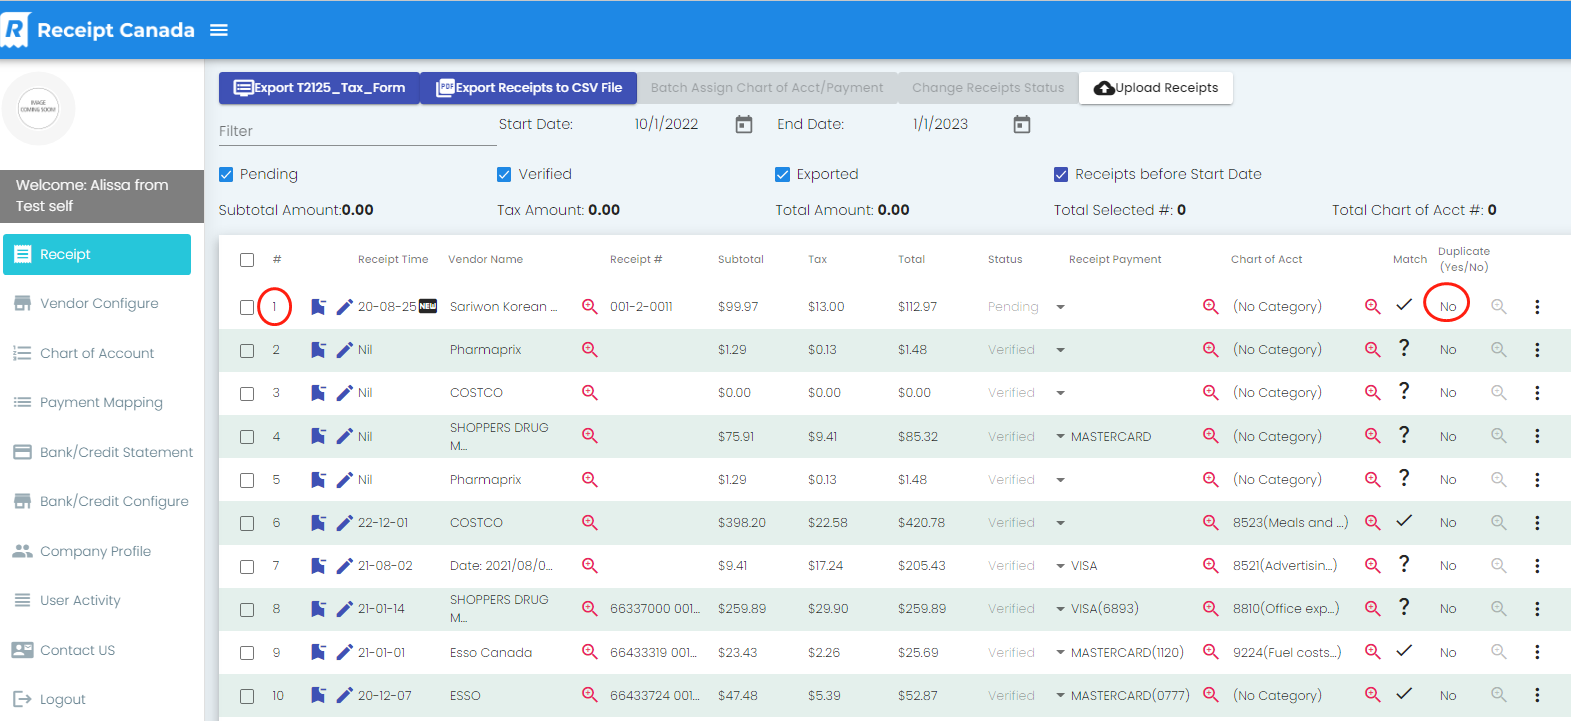
Receipt Data Filter
Search data via Filter by keywords e.g., Receipt amount, Receipt Number, Vendor Name etc., you will get the related receipts you want.


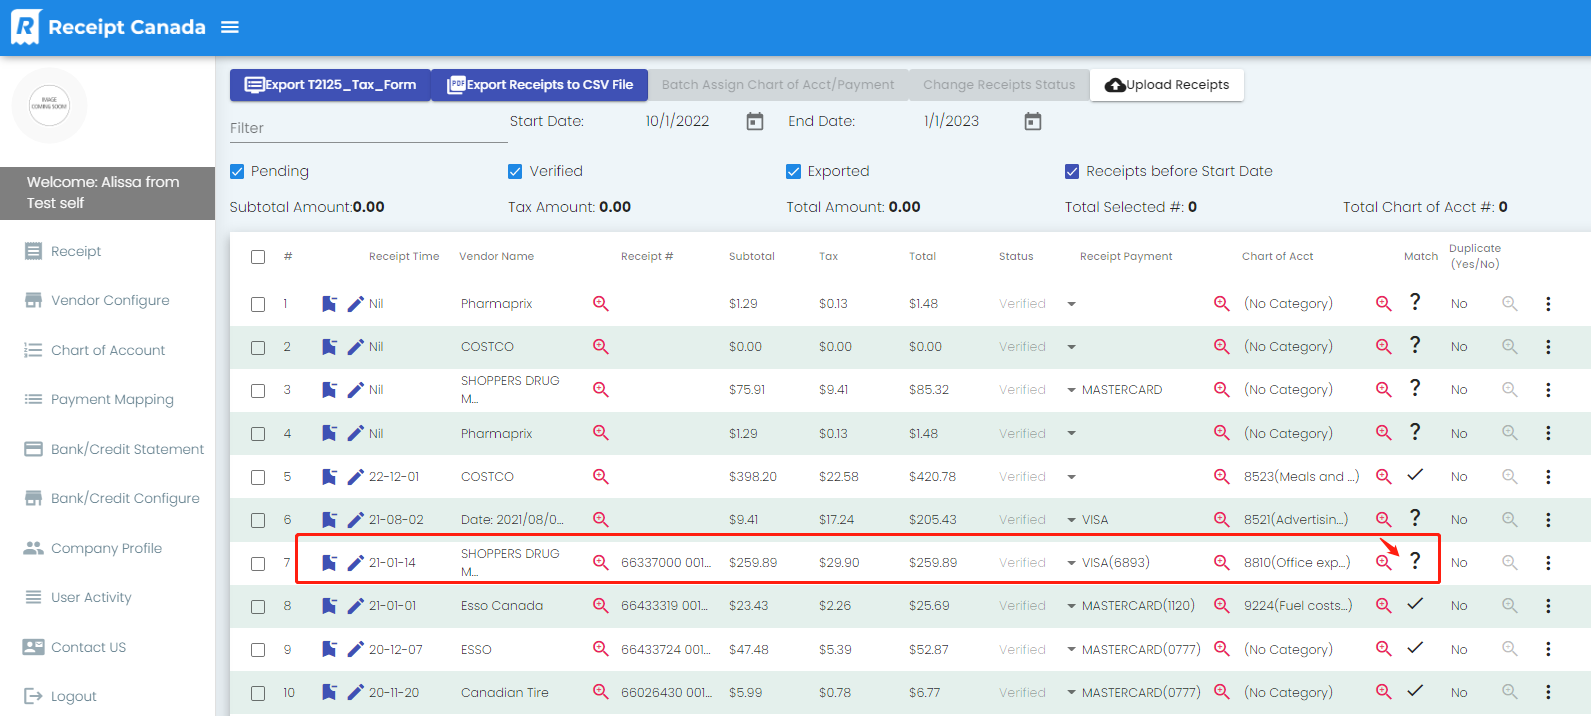
Match
Question Mark need to be addressed by clicking Editing, the pen shape icon.
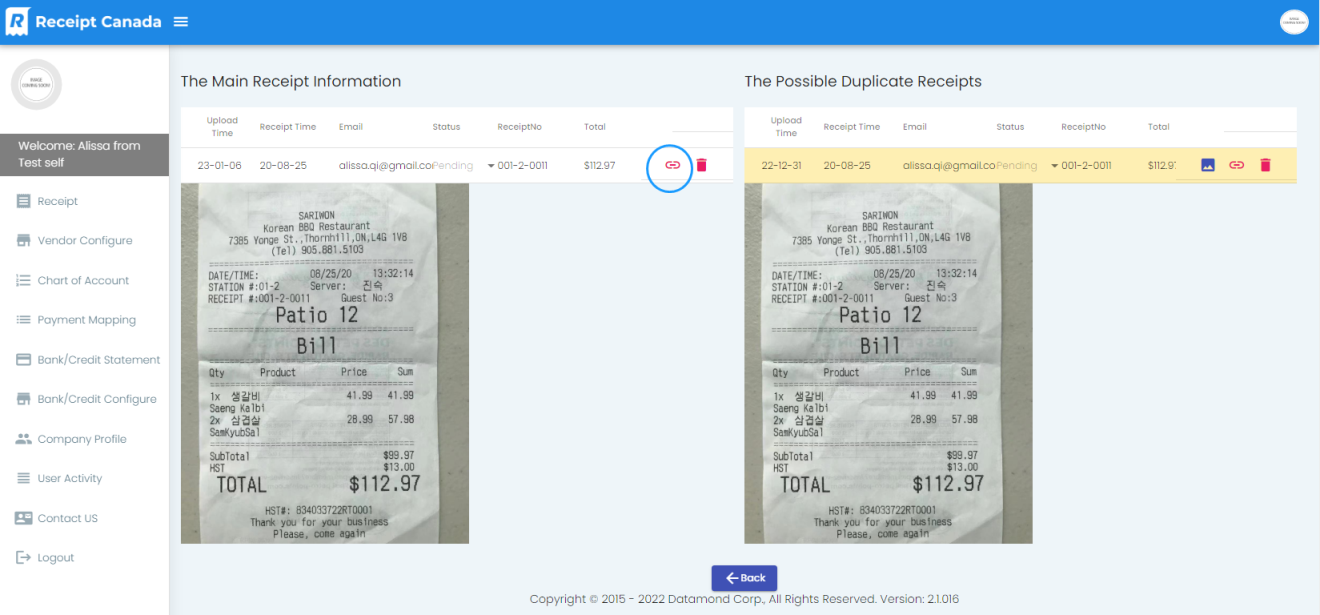
Duplicate Receipt processing
- That the lines are marked yellow stands for the receipts are uploaded duplicated. Please compare them shoulder by shoulder.
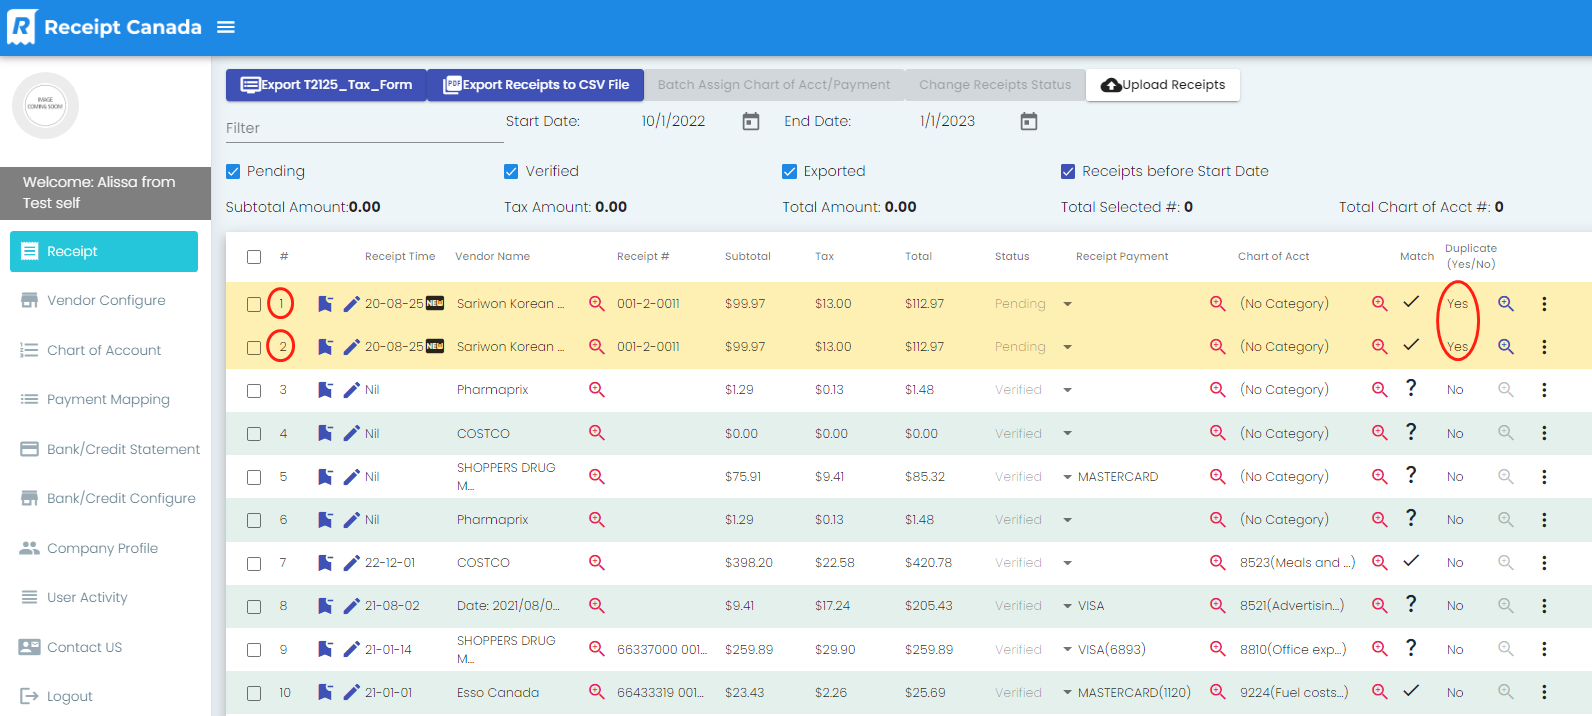
- Click Magnifier after “Yes”

- Delete either one of them if they are duplicated. Then click “Back”
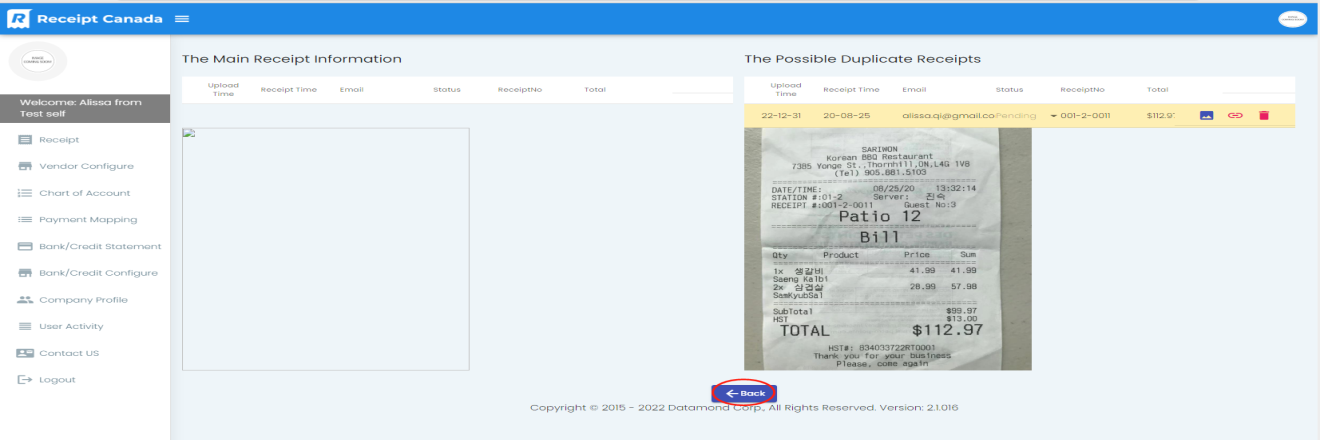
- Here is the example view if there is no duplicated receipt.
- Click “Keep” if they are not duplicate receipt
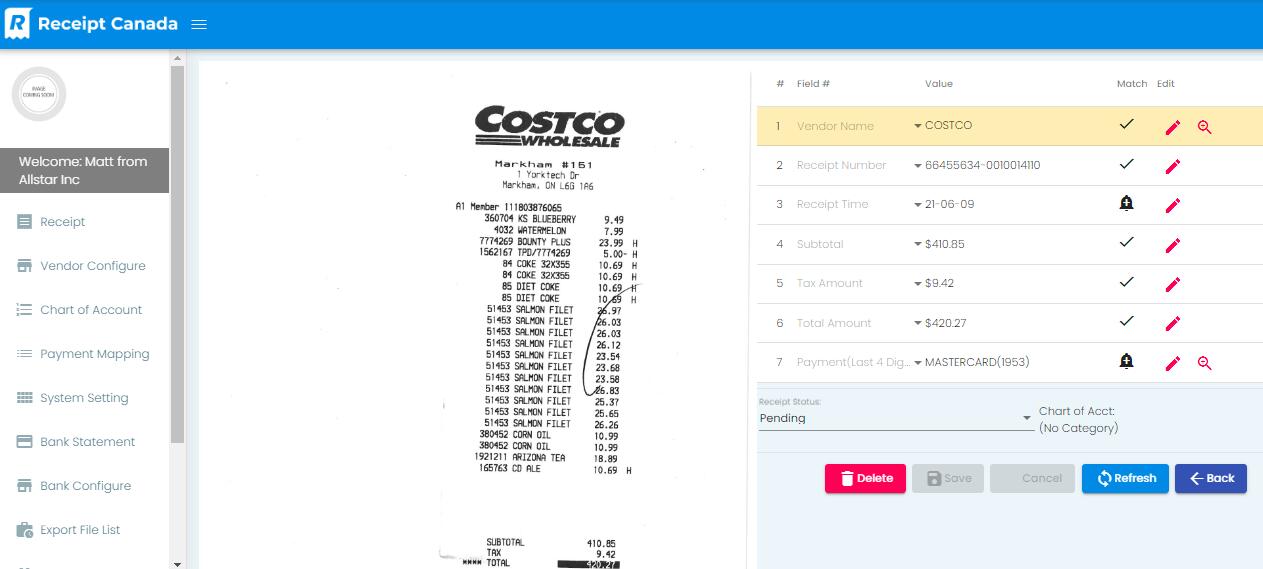
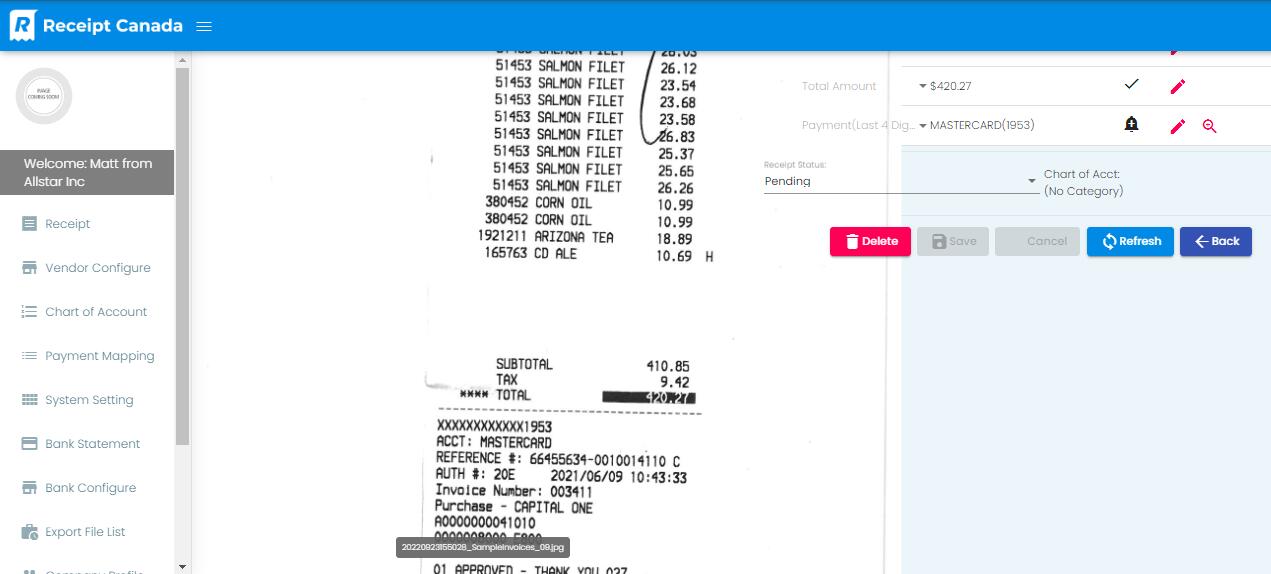
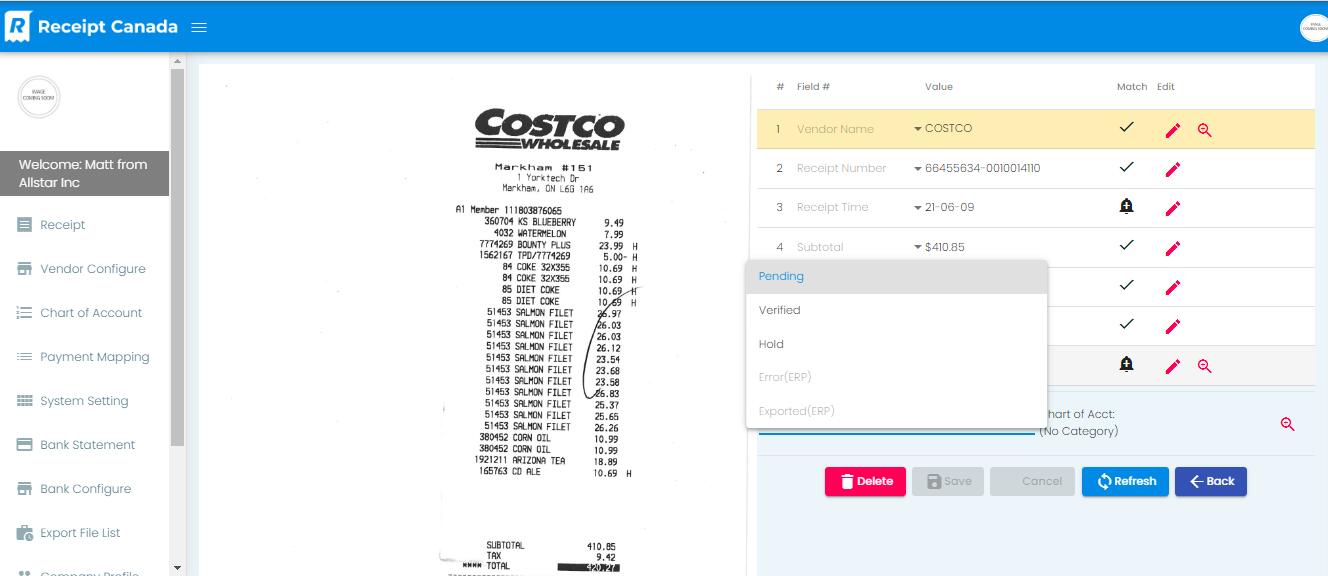
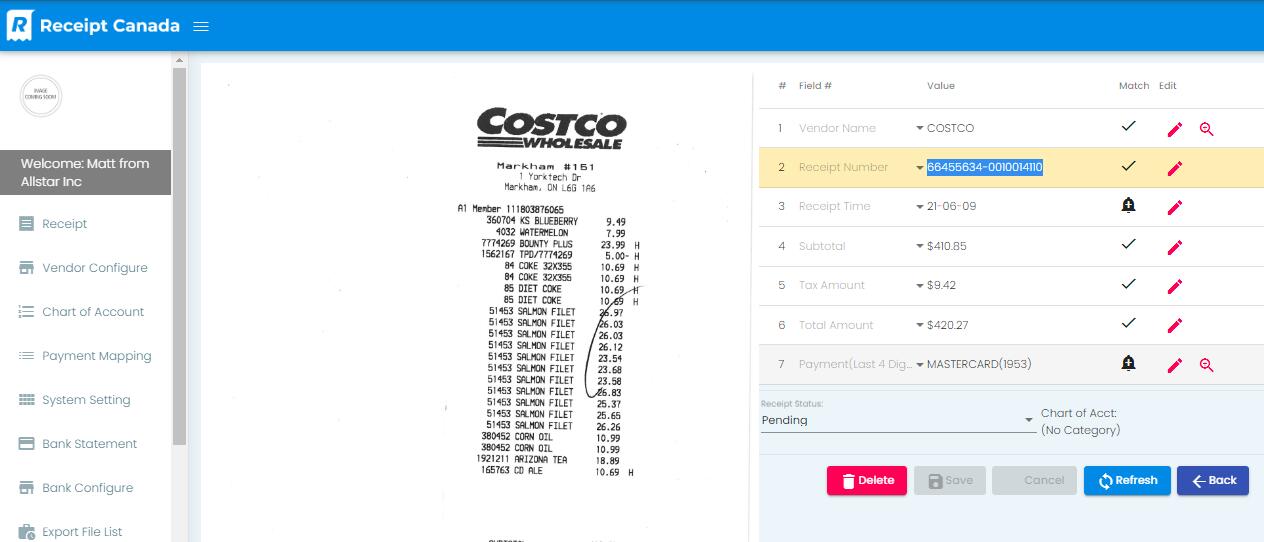
Verify the receipts data.
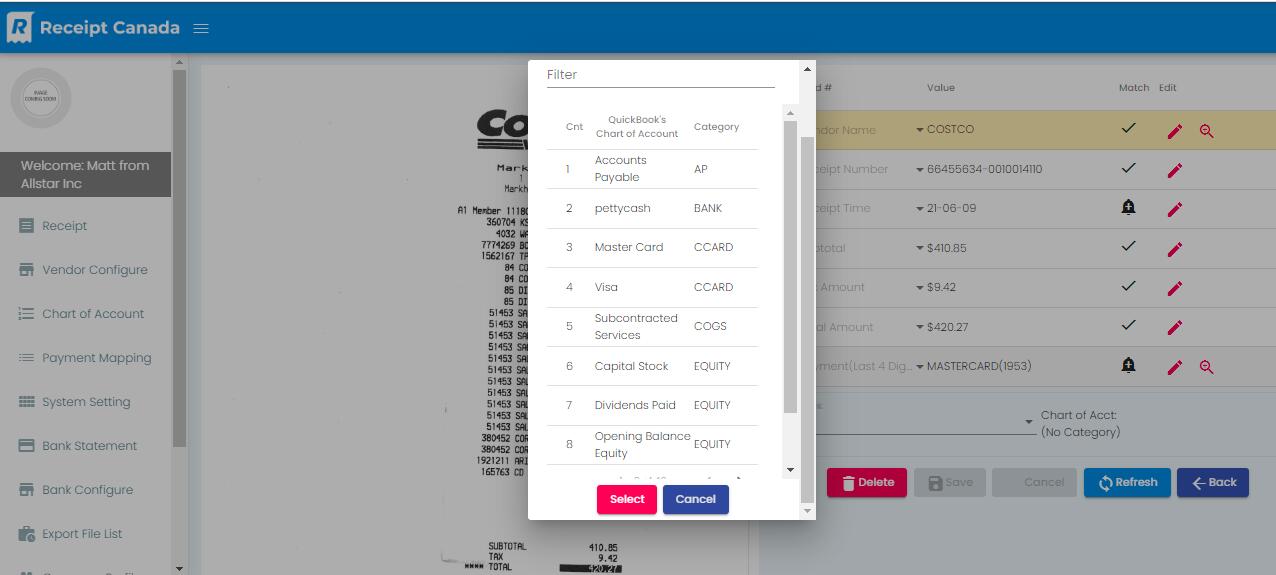
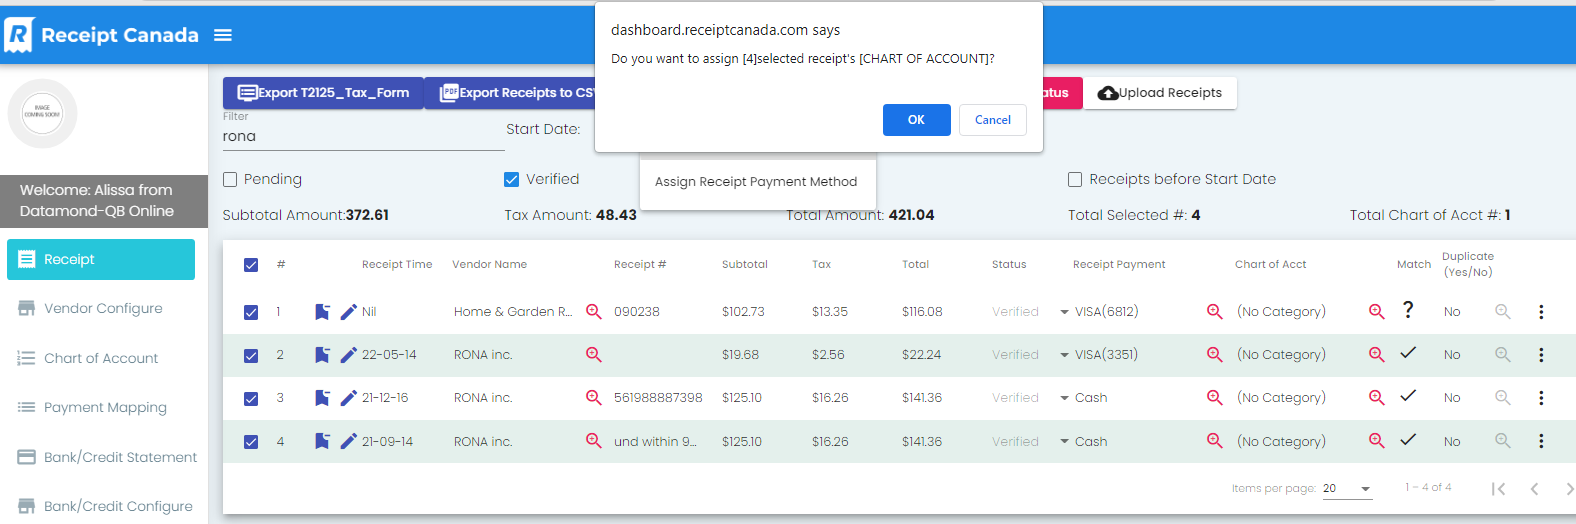
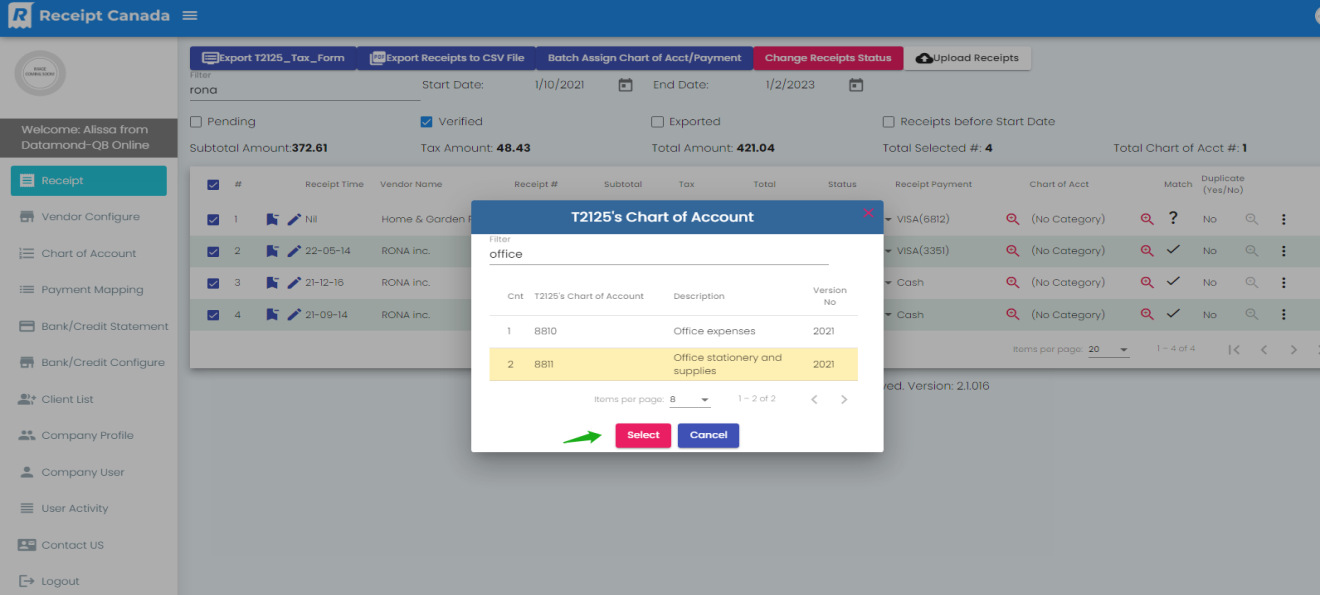
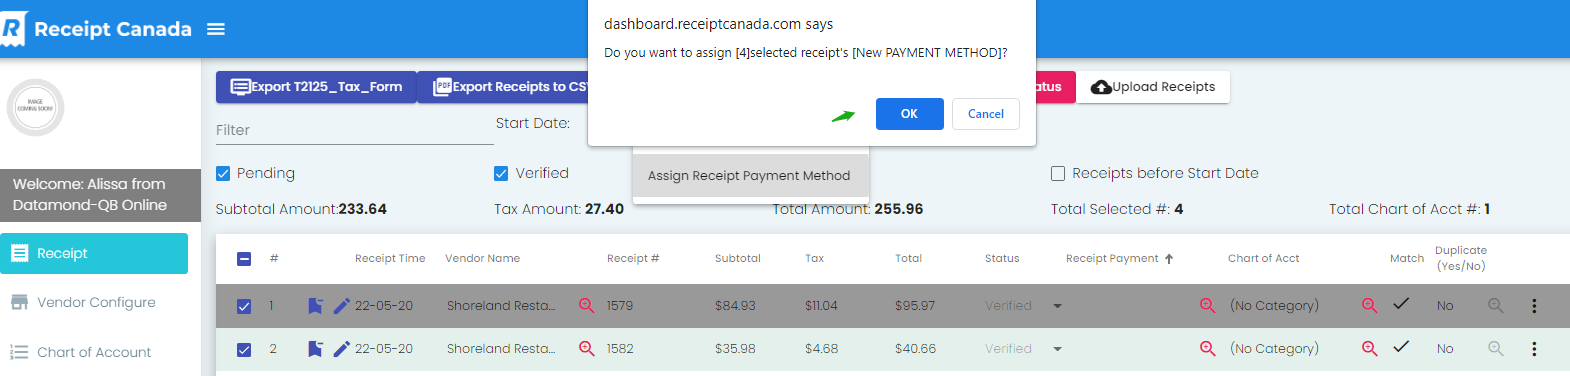
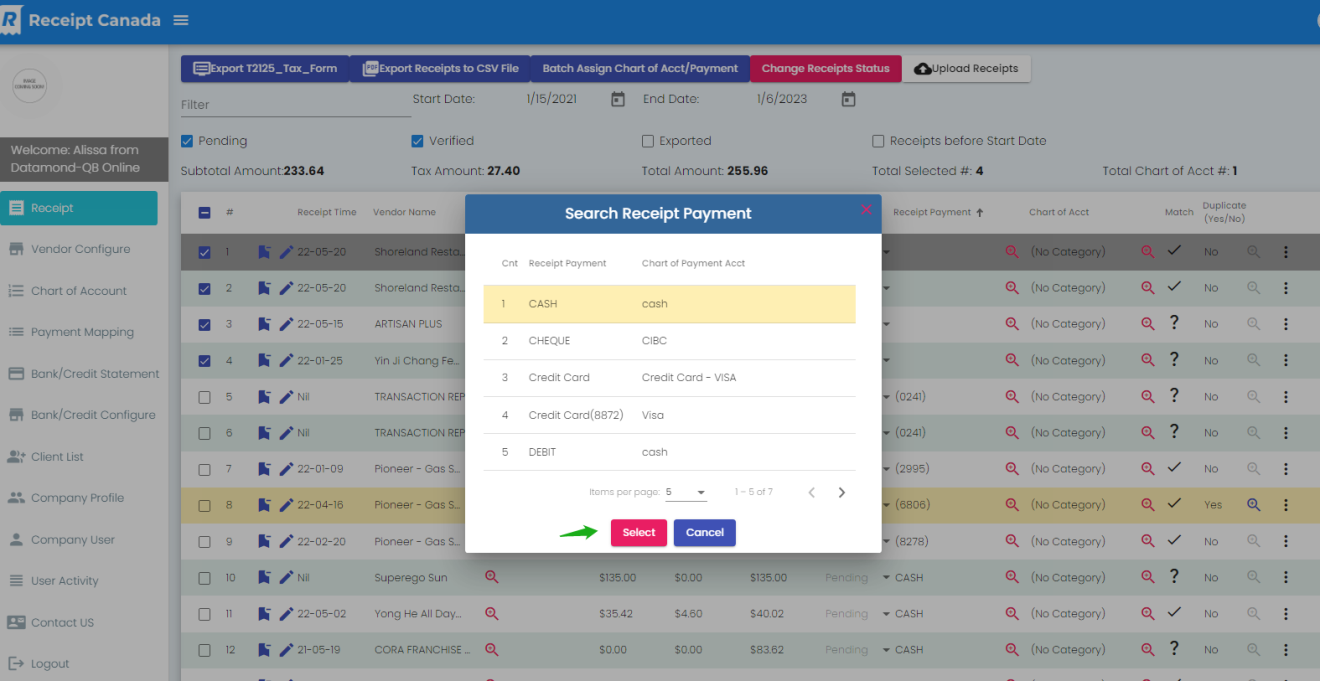
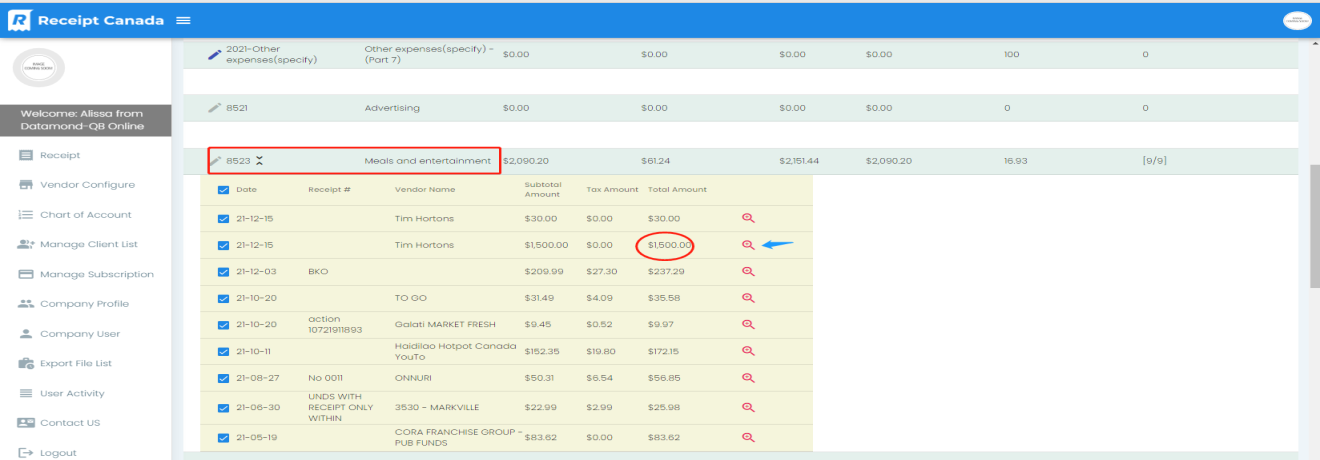
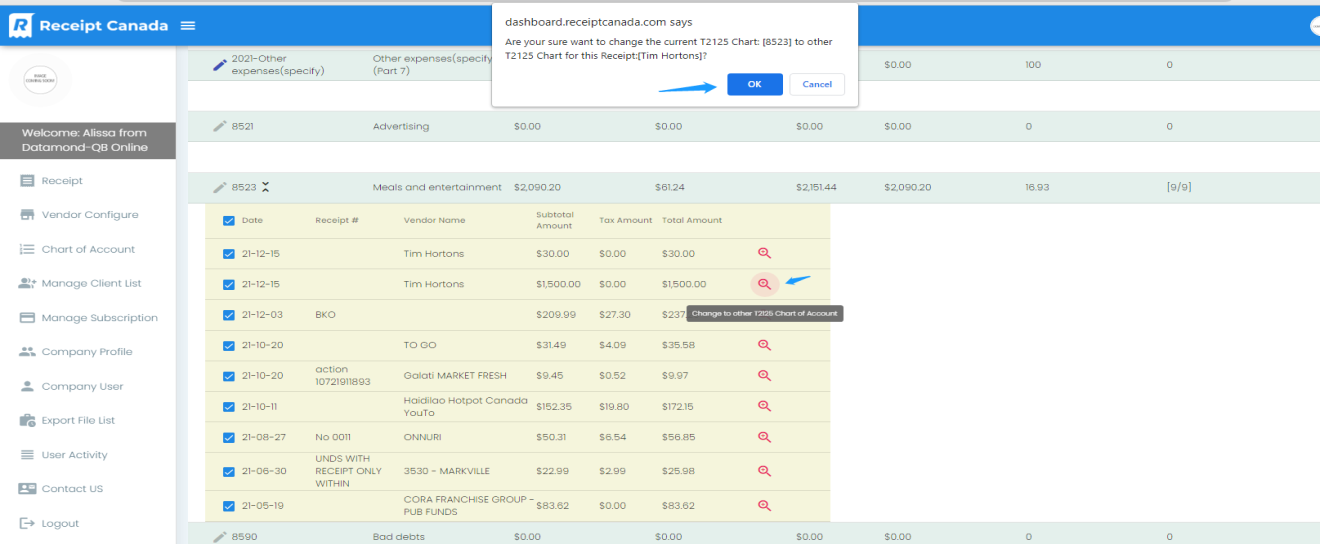
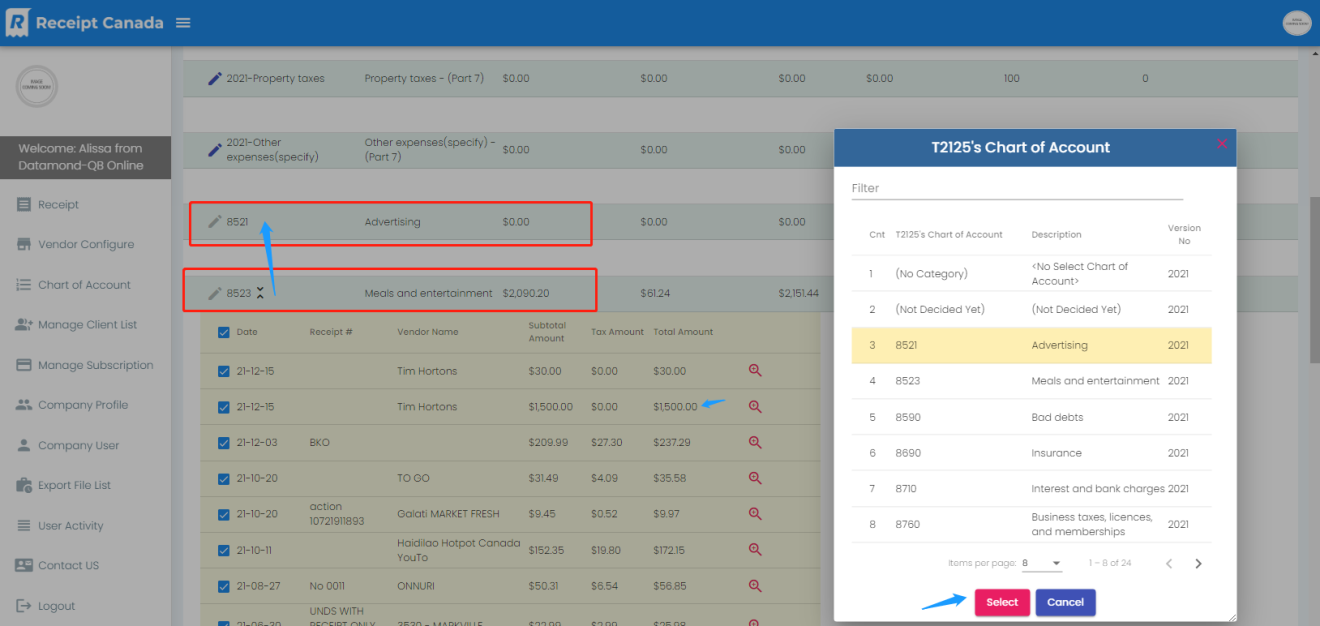
Batch Assign Chart of account /payment
- Assign Expense Chart of Account.
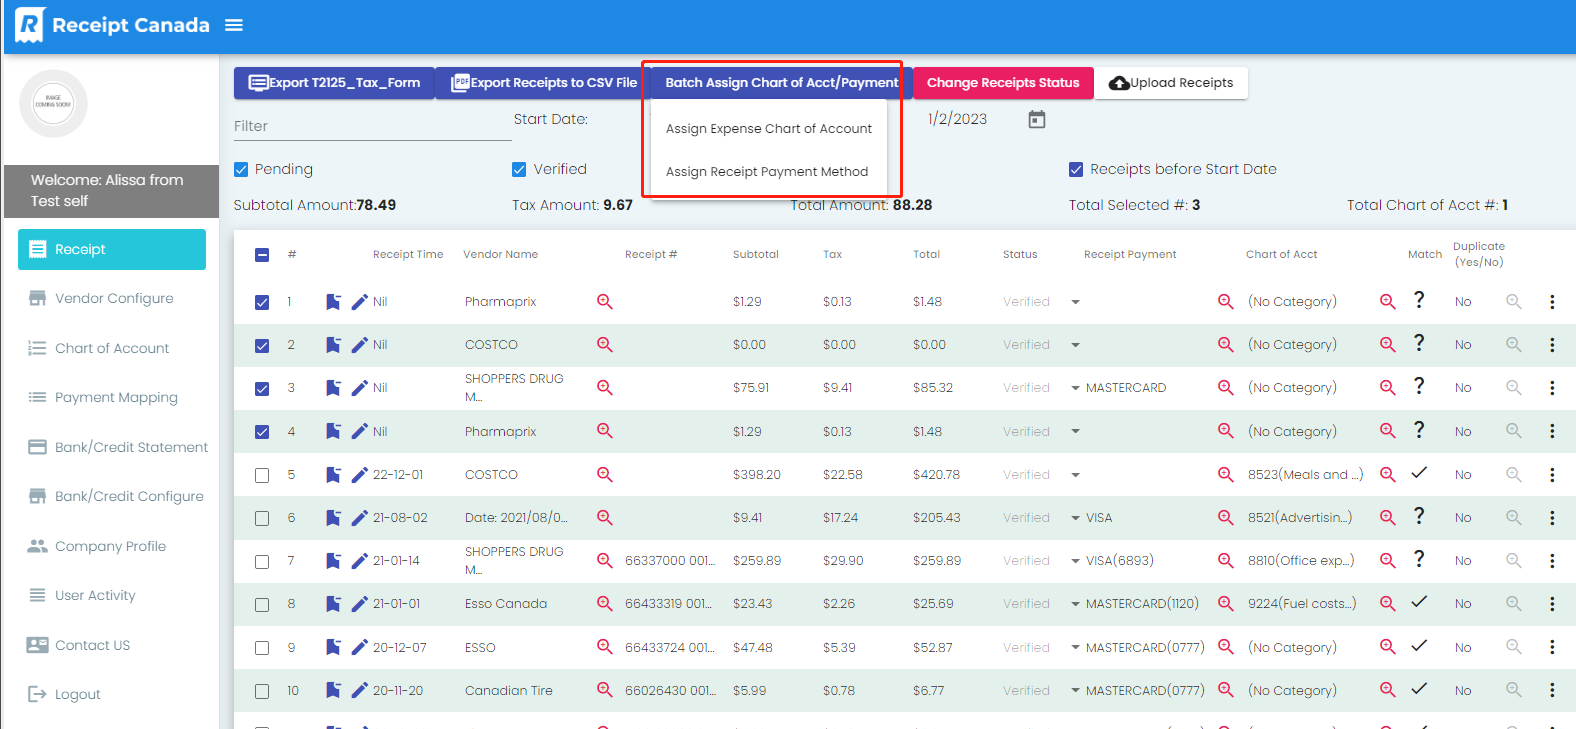
- Assign Receipt Payment Method.

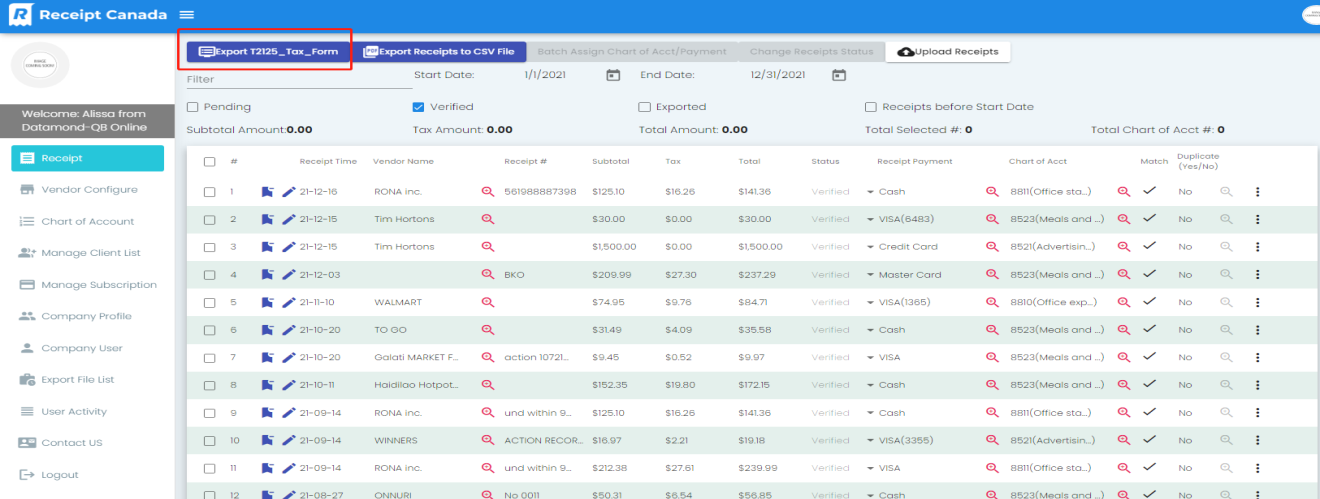
Export to T2125 Tax Form
- Click “Export T2125”
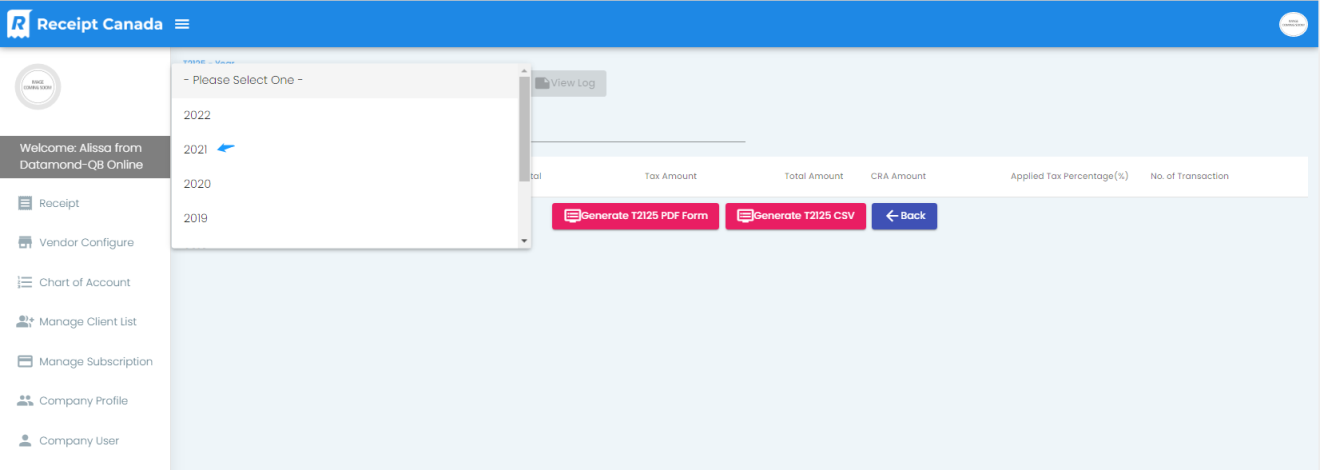
- Choose the tax year you want.
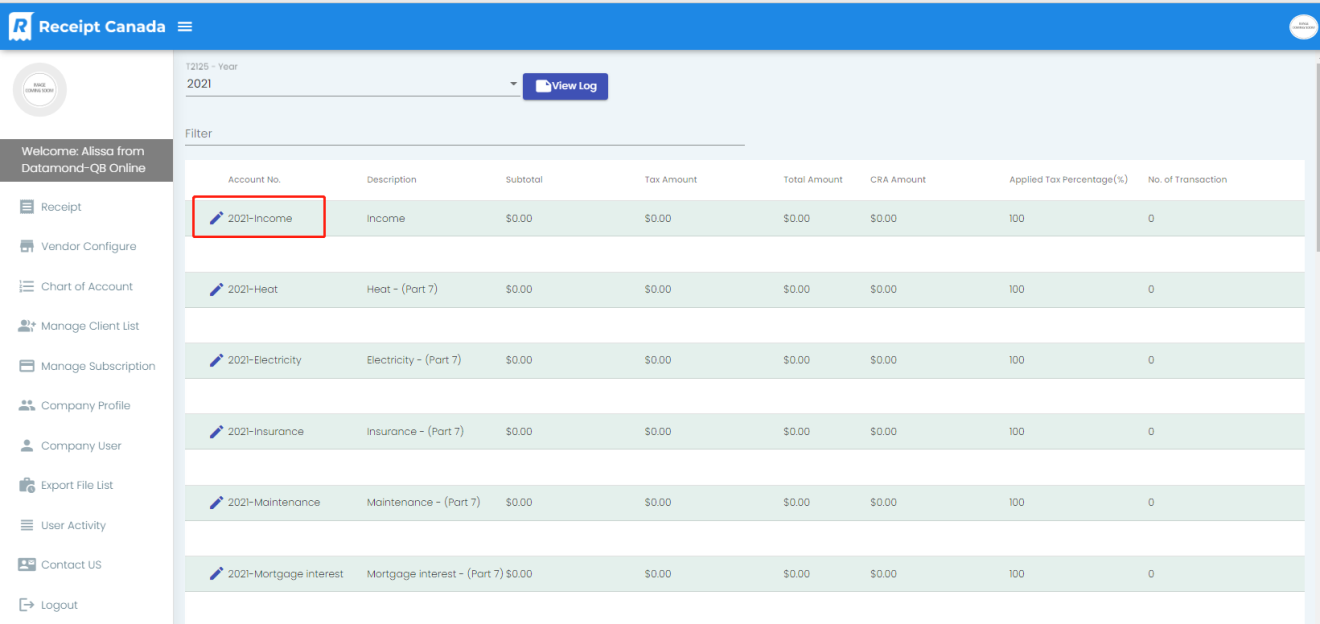
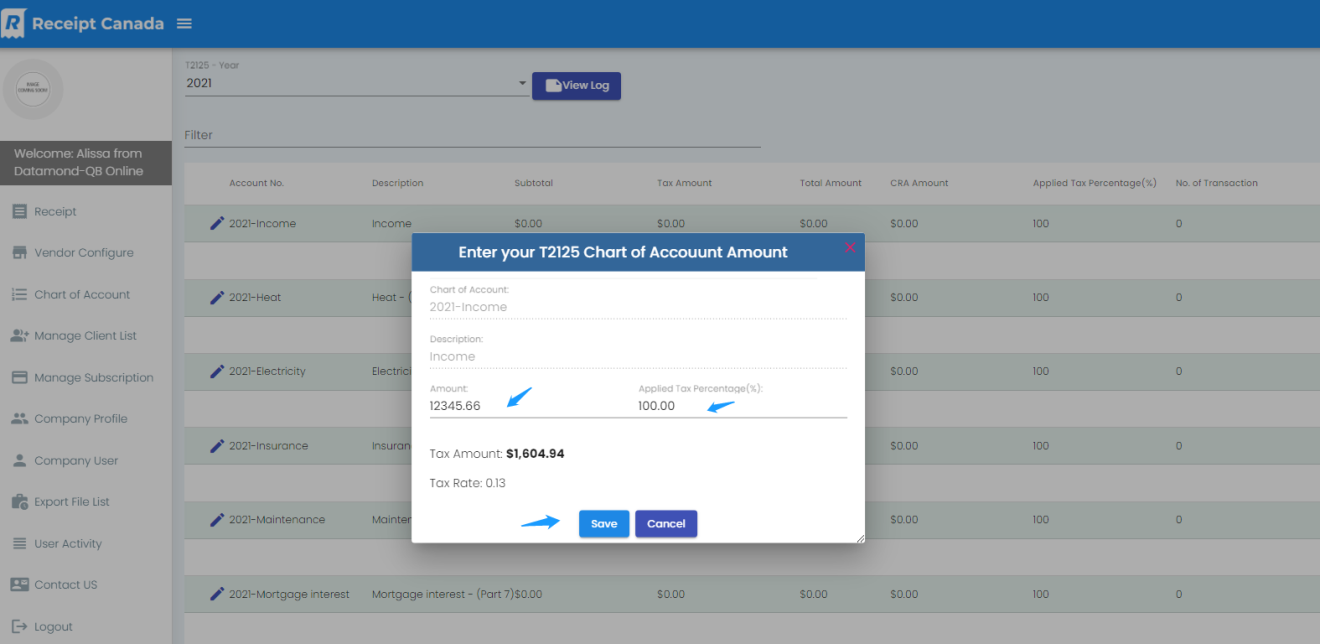
- Input your income of the tax year manually.
- Select receipts for tax usage.
- Update the Expense Account in T2125.

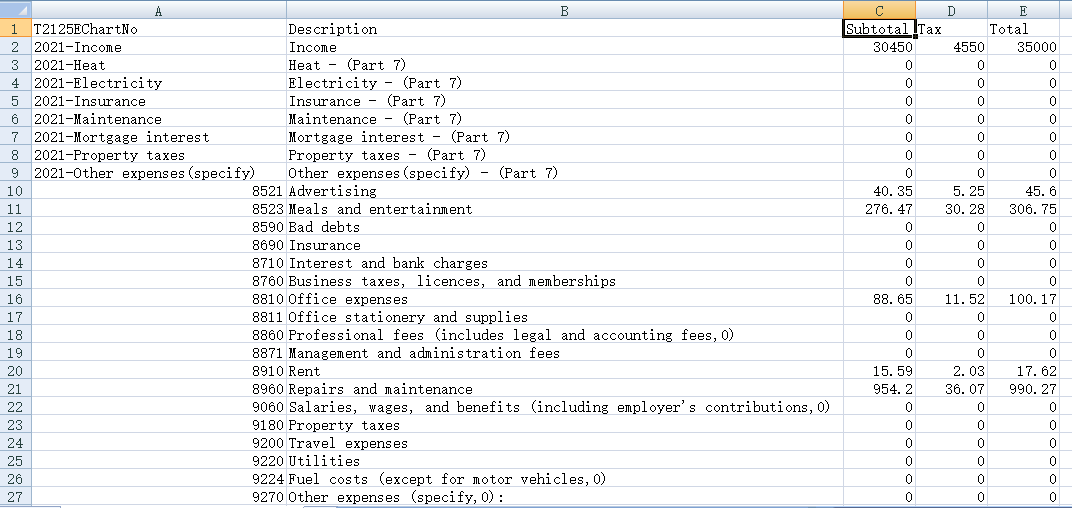
- Download in CSV file format.
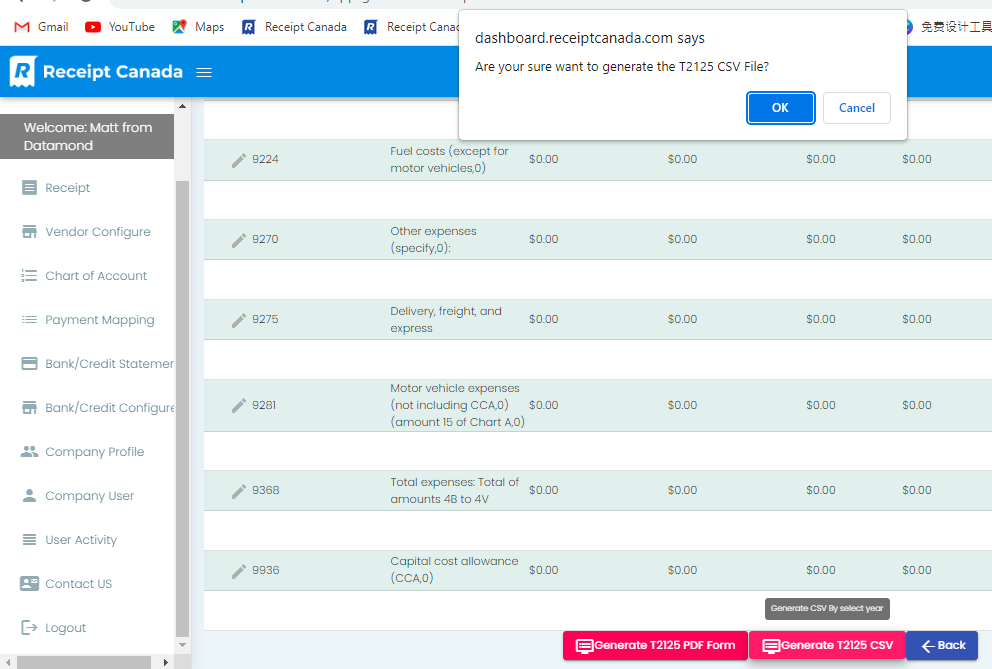
- CSV file example as below
Exporting data to Form T777
Same steps as exporting to T2125 starting Page No.30.
Using the System
For Self-employee
After registration, self-employee using this system please follow the steps as below:
Step-1: Upload the receipts image.
Step-2: Verify the receipts after upload.
Step-3: Assign the Chart of Account & payment mapping for receipts
Step-4: Revise & Edit the receipts data
Step-5: Export to T2125 or T777 Tax Form
Upload the receipts image
Please refer to section 2.2.3 & section 2.4
Verify the receipts after upload
Please refer to section 2.2.4 & section 2.5.4
Assign the Chart of Account & Payment Mapping for Receipts
Please refer to section 2.5.5
Revise & edit the receipts data
Please refer to section 2.5.2 & section 2.5.3
Export to T2125 or T777 Tax Form
Please refer to section 2.5.6
Payment Methods
For Self-Employed:
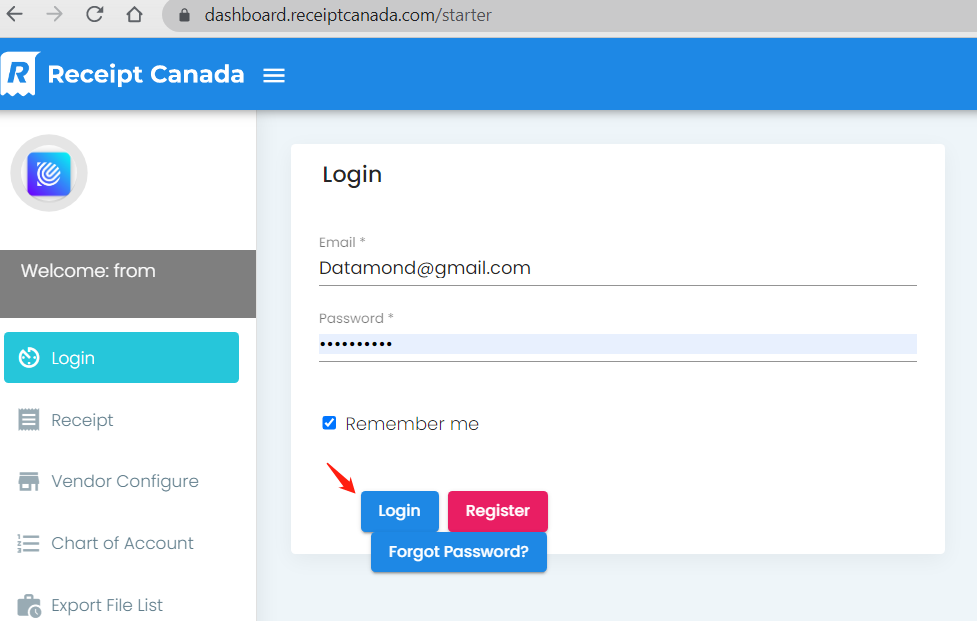
- Visit our website https://receiptcanada.com
- Sign In
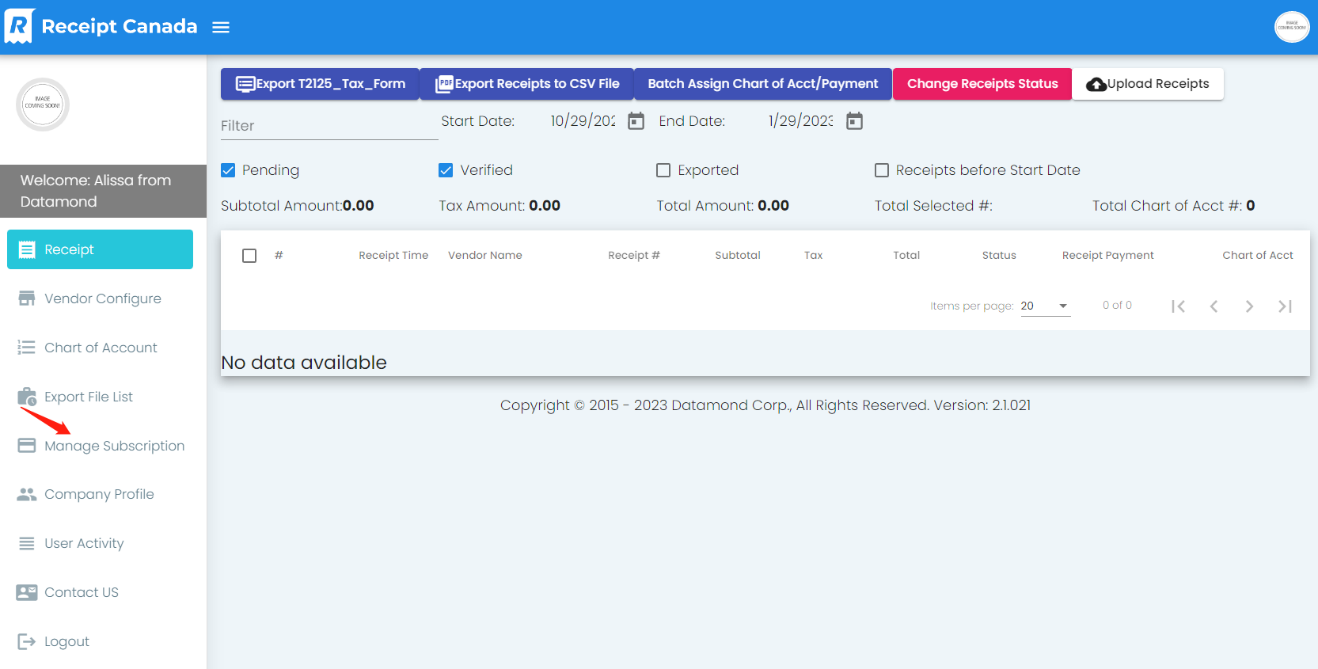
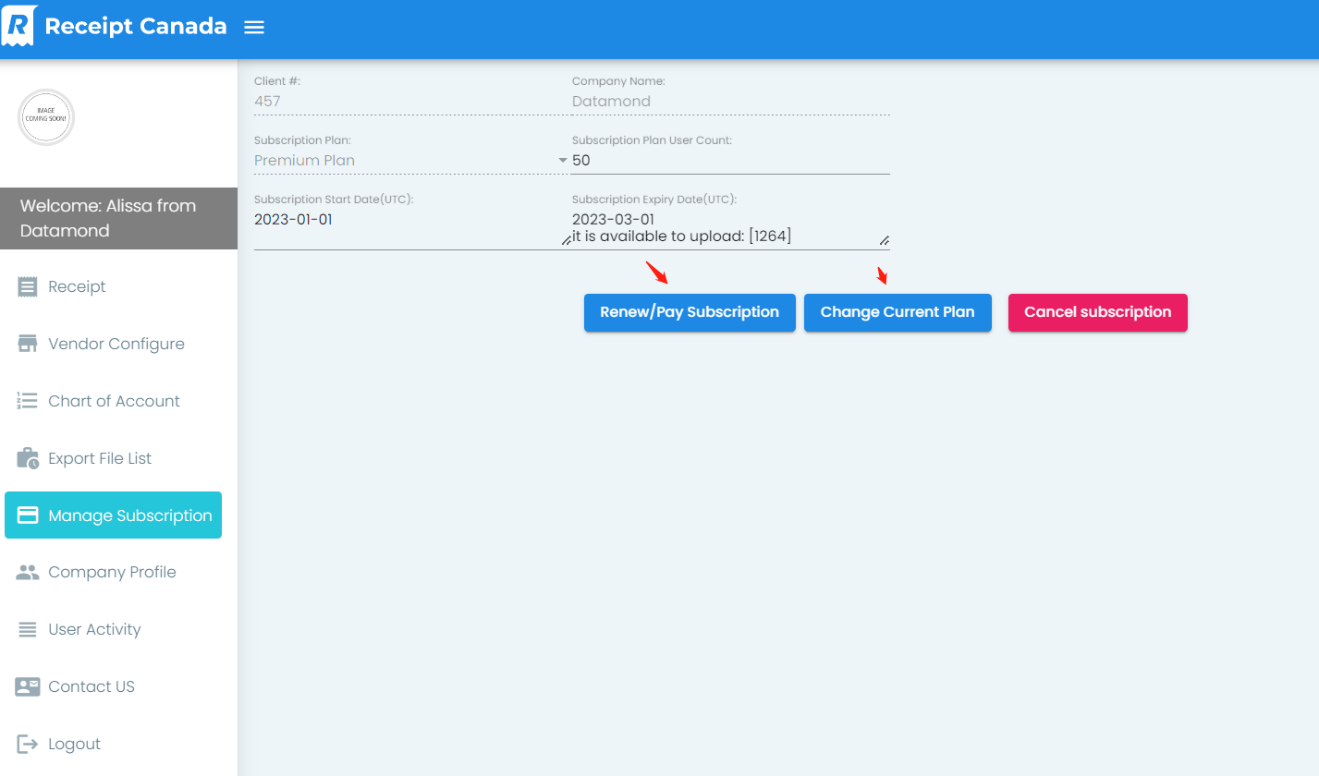
- On left navigation bar, click Manage Subscription
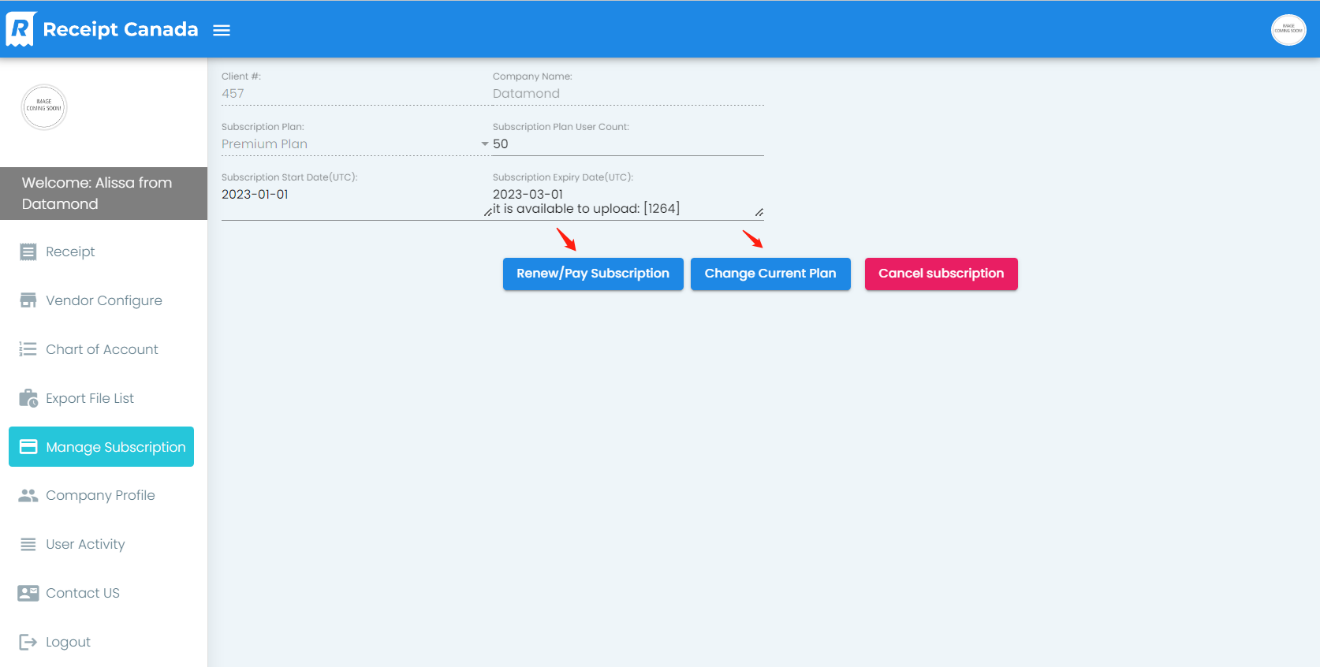
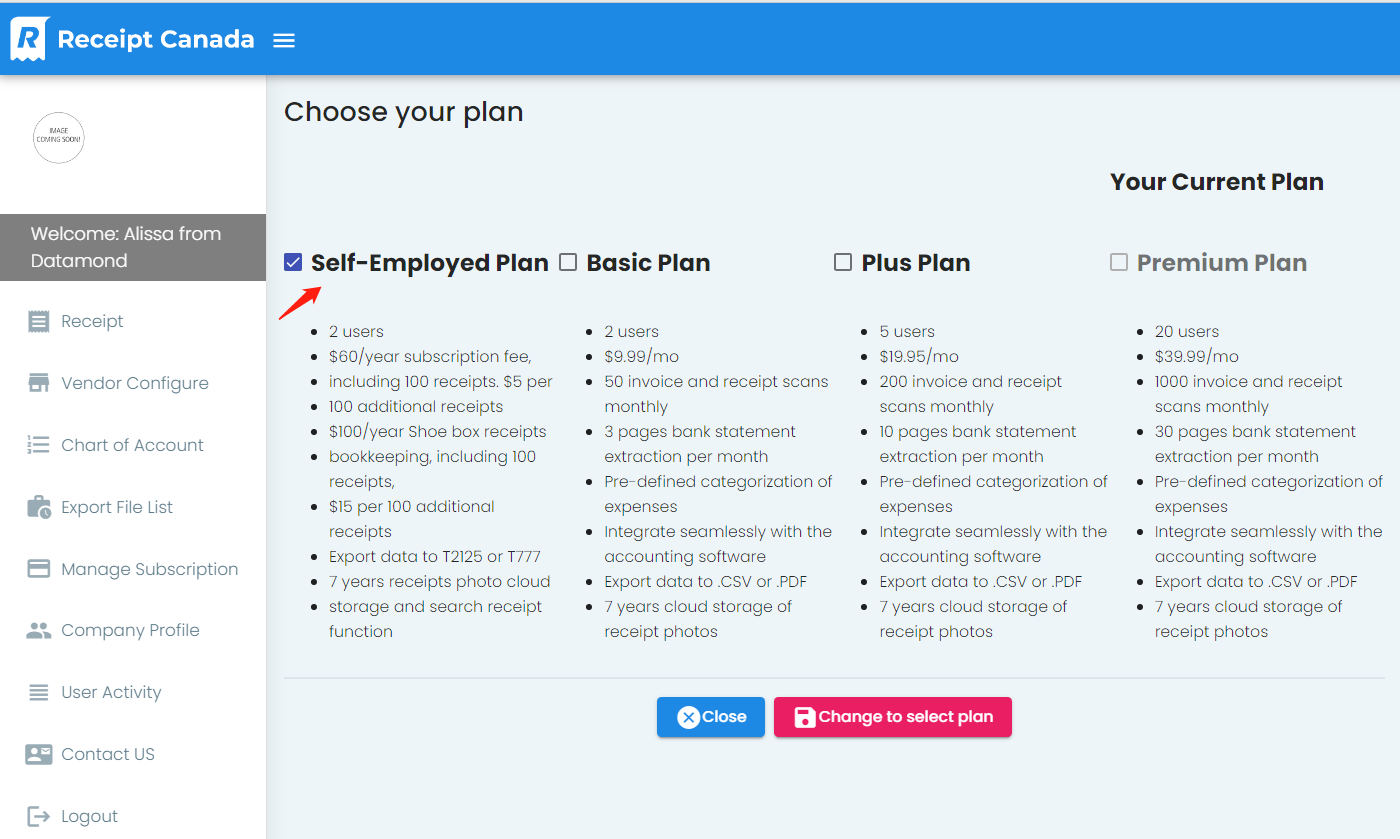
- Change Plan, or Renewal Plan
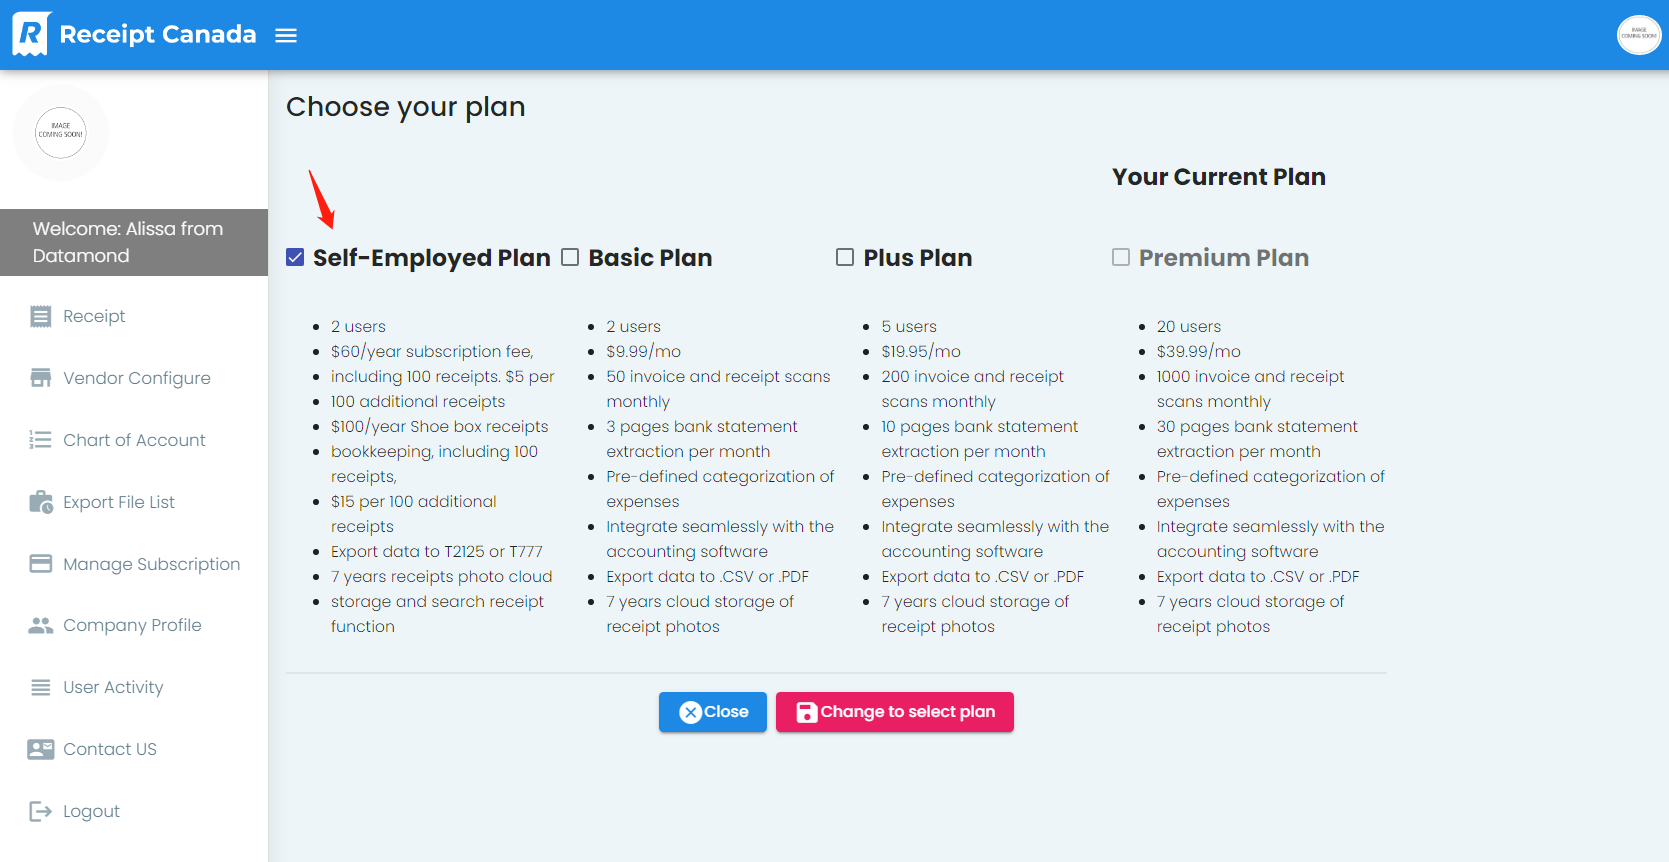
- Choose Self-Employed, one year subscription, $60+tax=$67.80
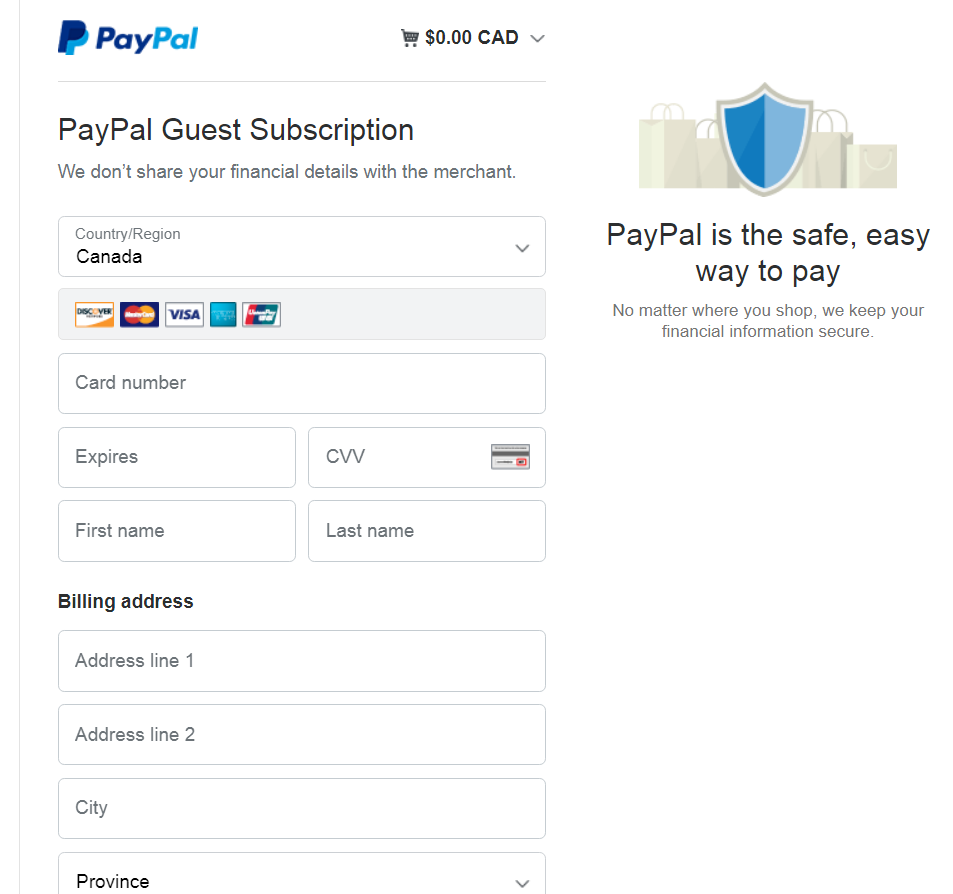
- Pay via PayPal,
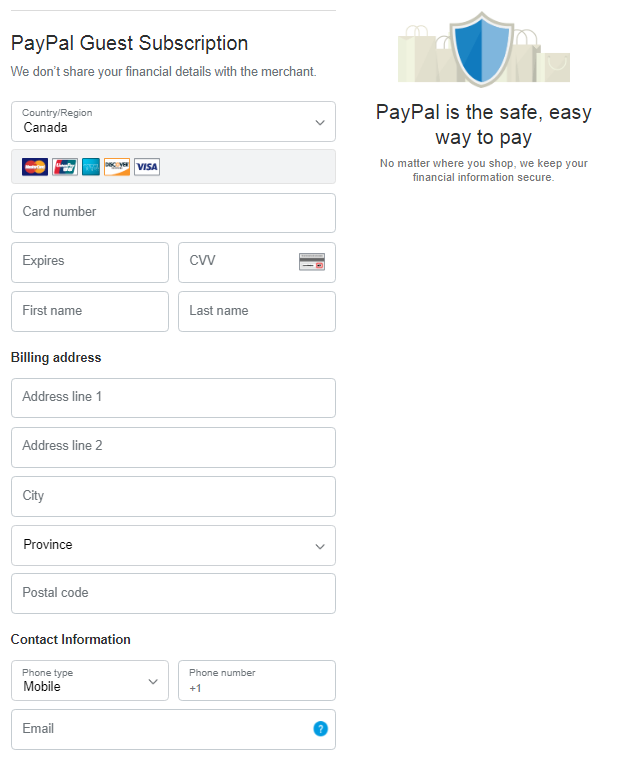
- either through your existing Paypal account,
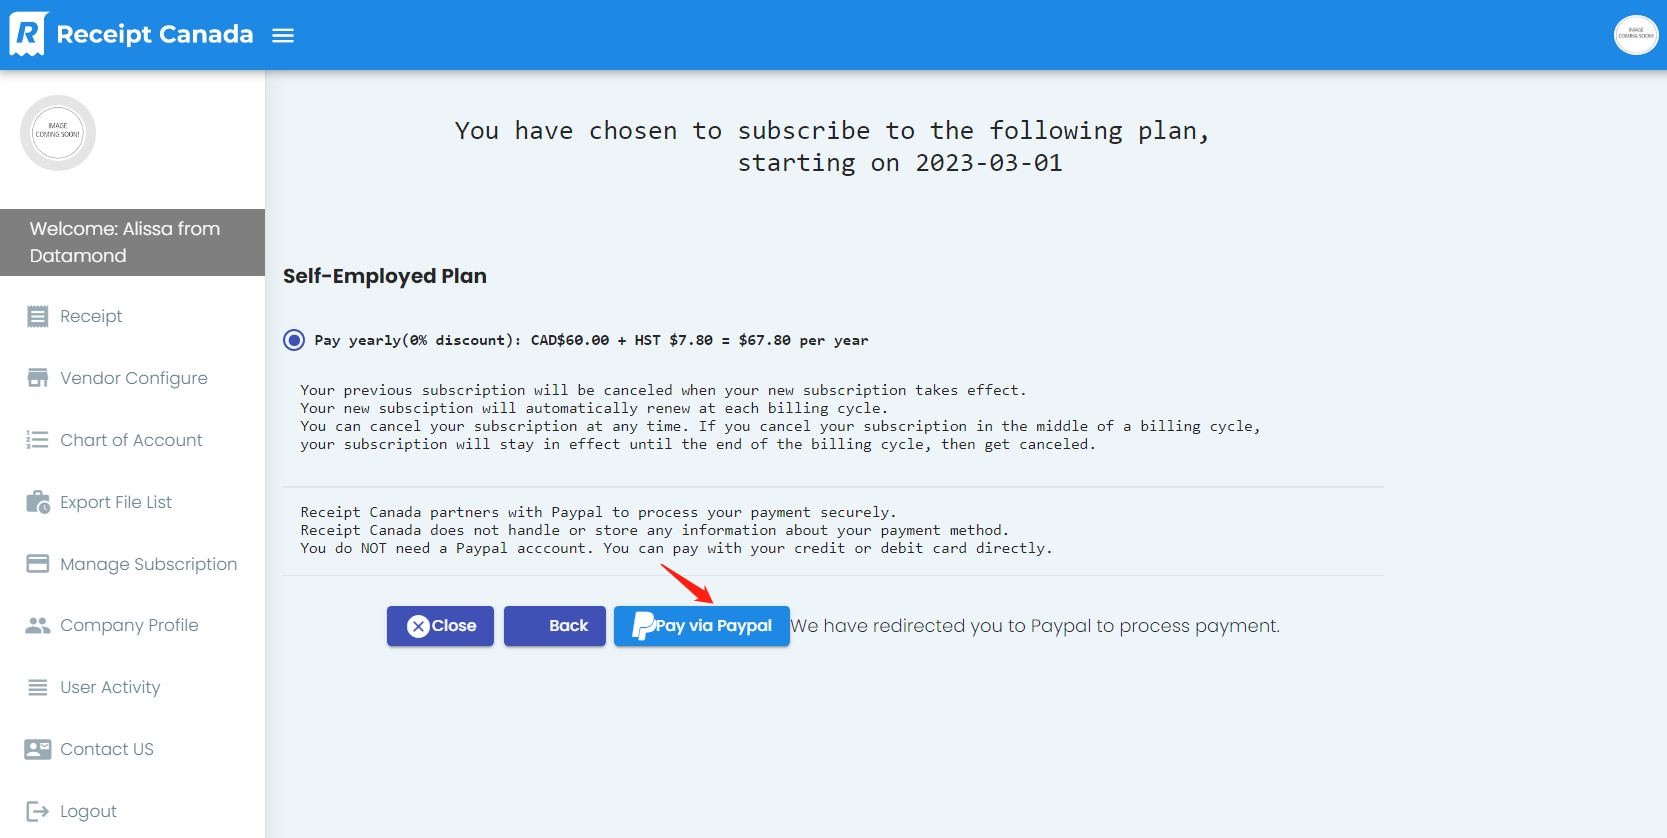
- or one-time credit card payment method.
Congrats! Payment Completed.
For Accounting Firms:
- Visit our website https://receiptcanada.com
- Sign In
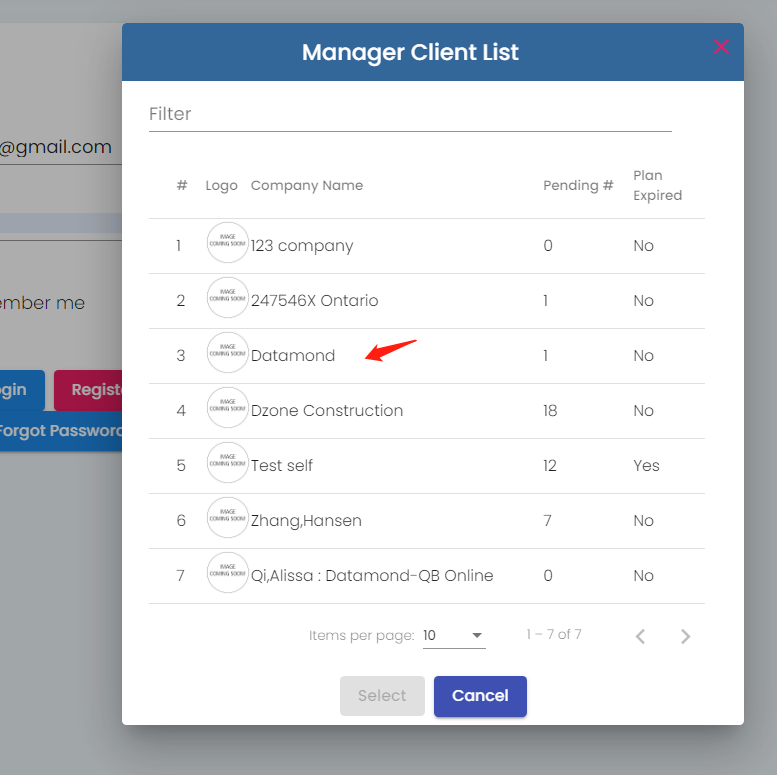
- After Sign-in, a list of accounting firm clients is pop-out.

- Choose the client you want to pay the subscription
- On left navigation bar, click Manage Subscription

- Click Change Plan, or Renewal Plan
- Choose Self-Employed plan, ie., one year subscription, $60+tax=$67.80
- Pay via PayPal,
- either through your existing Paypal account,

- or one-time credit card payment method.
Congrats! Payment Completed.
Questions? Please contact (416) 493-6288 or email service@receiptcanada.com